Snapseed is my favorite photo editing app for the iPhone and iPad. This app is from Google and free. In 2011, Snapseed (then from Nik Software) was an iPad App of the Year and was later purchased by Google. With Snapseed you can delete edits, apply them selectively or change them. You can also edit RAW photos and all changes can be undone. These are important reasons for me to use Snapseed and to create this Snapseed manual.
The photo editing videos in this Snapseed manual
The instructional videos in this Snapseed manual are still up-to-date, but were made with the previous version. However, the differences with the new interface are small; the tools and filters menu in the videos has been replaced by the tools button. The icons look different but have the same labels.
My workflow
I usually start by trying out a number of Looks and I often use Pop. Then I crop the iPhone photo with the Crop tool. With vignetting I make the corners and edges darker, so that the focus is on the center. As soon as I am done, I save the photo and export a copy for Instagram. All changes can be undone and only become definitive in the exported copy.
Content of this Snapseed manual
Click on a topic to jump to it.
Looks, Tools and Filters
Tools
Filters
- Lens Blur
- Snapseed Glamour Glow
- Tonal Contrast
- HDR scape
- Grunge
- Retrolux
- Noir
- Black & White filters and Black & White with one color
Additional
Snapseed manual Looks, Tools and Export
You will see these buttons at the bottom of your screen as soon as you have opened a photo in Snapseed.
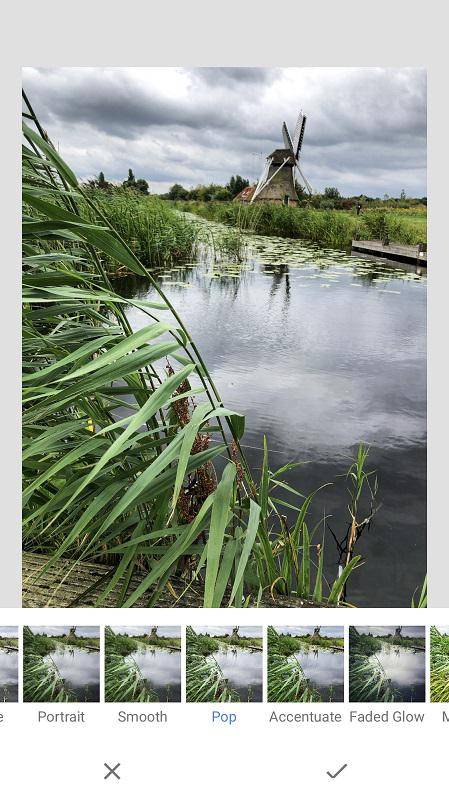
Looks
With the Looks button you can choose from a number of presets. Tap a look to view the result and tap the check mark to accept it. You can view or edit the applied editing steps by tapping the left arrow at the top right and then selecting View Edits.
Editing steps that you have applied to a photo can be saved as a new look and then performed on other photos. Tap Looks, swipe your finger to the left and tap the plus sign. Then give the look a name and tap ok. Tap the three points on the far right to manage your looks.
Snapseed manual, selectively apply an operation
Select a tool or filter and apply it to the photo. Next, go to View edits, tap the editing step, and then tap the brush. Then select the area to be edited. In this example I applied the tool details selectively to the plants.
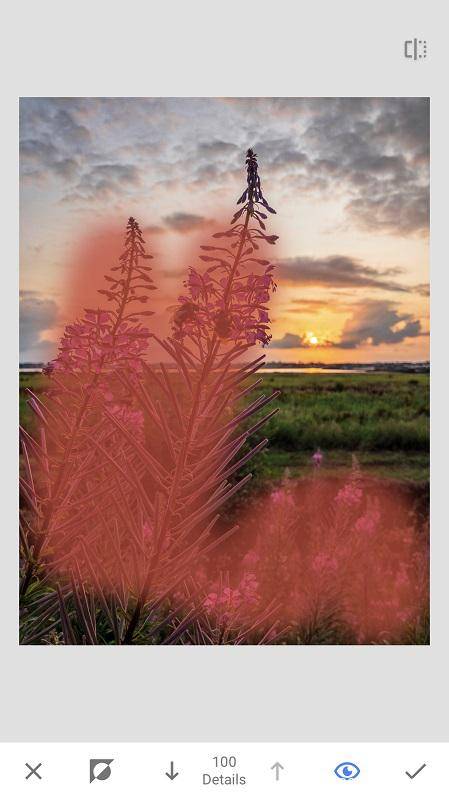
This video shows how you can remove, selectively apply or change an editing step. The number icon in the video has been replaced in the new Snapseed version by the arrow to the left at the top right of the screen.
This video shows how you can insert an editing step between the other editing steps.
Tools and export
Tools gives access to the main menu with all functions and filters. With Export you can share, save, copy and export a photo. All changes can be undone and only become definitive in the exported copy.
Snapseed manual Tools
Snapseed manual, Tune Image
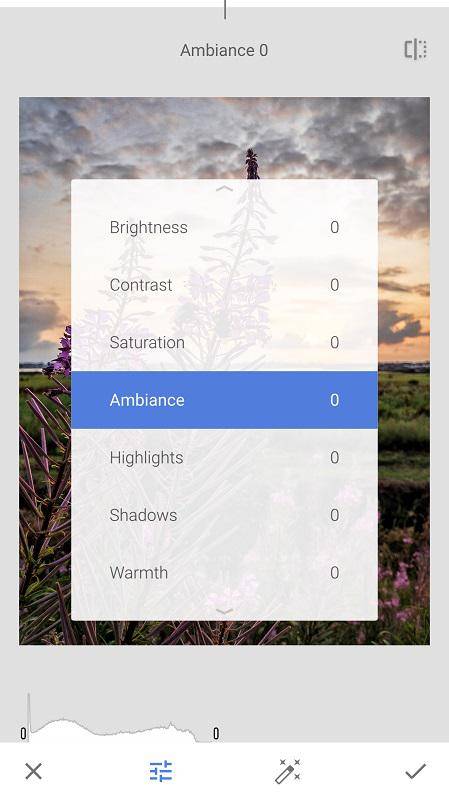
Go to tools and select Tune Image. Swipe your finger up or down for the settings, and then swipe horizontally to increase or decrease them. You can have Snapseed automatically make corrections or adjust brightness, contrast, saturation, ambiance, highlights, shadow and warmth manually. Tap the check mark at the bottom right to apply the changes.
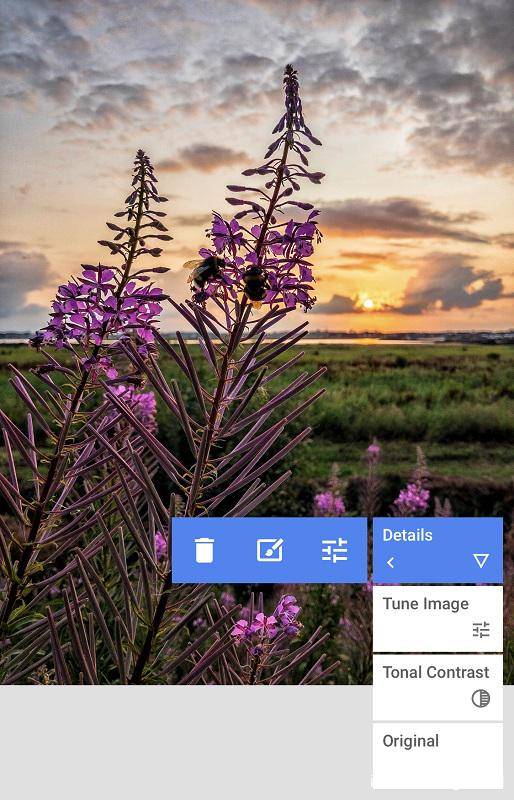
Details
With this filter you can enlarge and sharpen the details of a photo. Go to tools and select details. Swipe your finger up or down for the settings, and then swipe horizontally to increase or decrease them. Tap the check mark in the lower right to apply the changes.
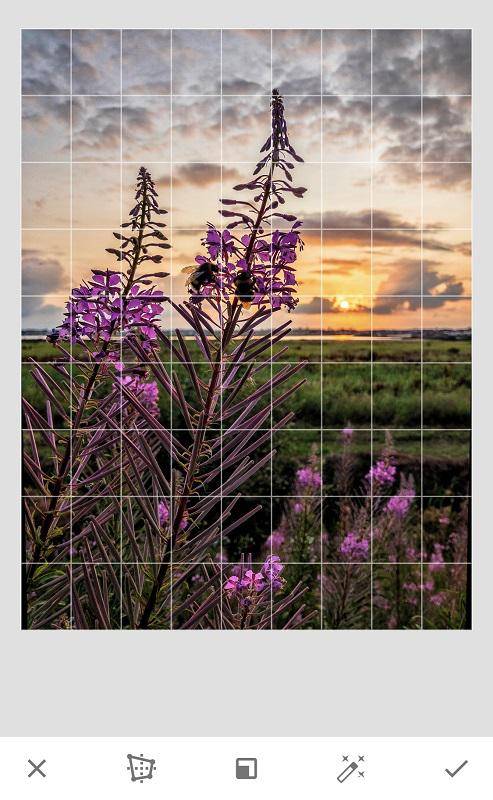
Crop
Go to tools and select Crop. Drag a corner of the photo to enlarge or reduce the image. You can move the frame by tapping on it and then swipe your finger. You can also change the length / width ratio to square, 3:2, etc. Tap the check mark at the bottom right to apply the changes.

Perspective
Perspective means the position of the photographer. With this tool you can change the perspective to, for example, straighten a building. Go to tools and tap Perspective. Hold your finger on the screen and swipe horizontally or vertically. Tap the check mark in the lower right to apply the changes.
Rotate
With Rotate you can straighten, rotate or flip a photo. Go to tools, tap Rotate and swipe your finger on the screen to straighten the photo. Tap the check mark in the lower right to apply the changes.
Brush
With the Brush you can selectively change the brightness, exposure, temperature and saturation. Go to tools and select Brush. Choose a brush and swipe your finger across the screen. You can set the transparency of the brush with the arrows and tap the eye icon to display the brush strokes in orange. Tap the check mark in the lower right to apply the changes.
Selective
Select an area to change the brightness, contrast, saturation, and structure. Go to tools and select Selective. Tap the check mark in the lower right to apply the changes. View the videos below.
Snapseed manual, Vignette
Reed also my blog How to add vignetting to your photos.
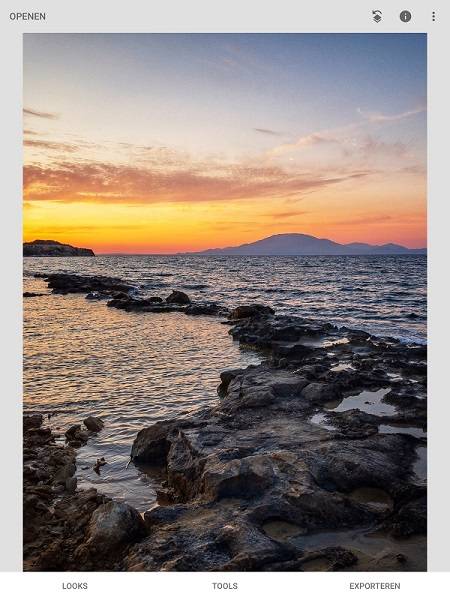
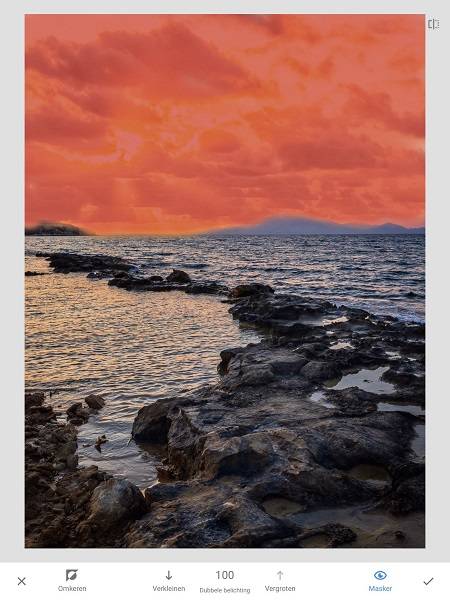
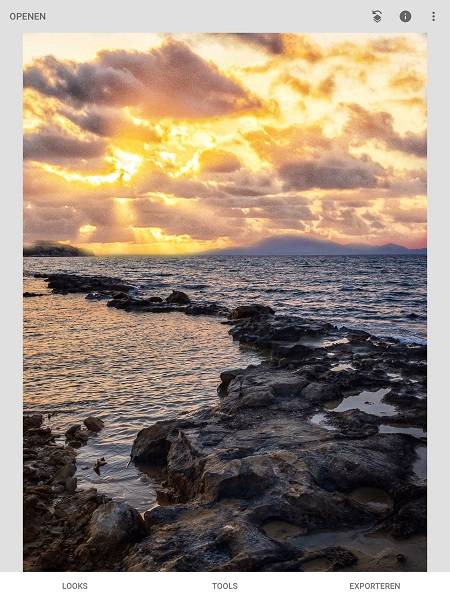
Double exposure
With double exposure you can open two photos at the same time. Open a photo and then tap Tools / Double exposure and then the +sign to open a second image. The second photo is placed on top of the first. With the Transparency slider (drop symbol) you can determine the opacity of the second photo. Tap Style (book symbol) for a number of presets.
For example, you can use the Dual Exposure tool to add an object, such as a person or sky, from another photo. As an example I have replaced the sky of a photo.
Editing steps
- Open the photo from which you want to replace the sky.
- Open the second photo with Double exposure, so that you can see both photos. Move it by swiping your finger until the sky is in the right place. You can enlarge or reduce the photo with pinching. Tap Transparency and swipe the opacity slider all the way to the right. Tap the check mark in the lower right corner.
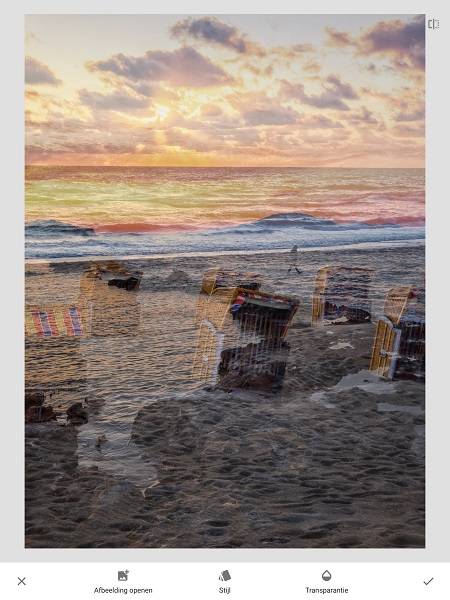
- Then go to View edits, tap Double exposure, and then tap the brush. Select the sky by swiping and tap the check mark. The new sky becomes visible because the selected part has been made opaque. You can possibly make the selection more accurate by selecting the brush again and then zooming with pinching. You can expand the selection by swiping. To decrease the selection, first tap the down arrow until the value is 0, so that you can erase.
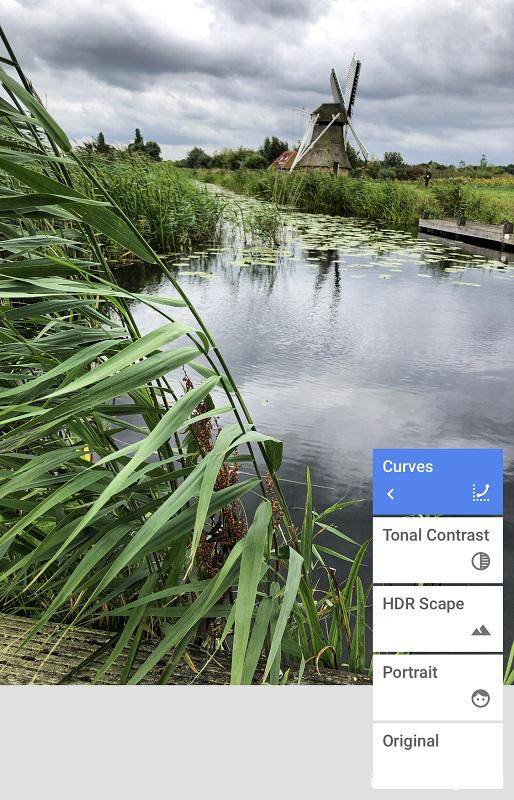
Snapseed manual, Filters
Snapseed manual, Lens Blur
With this filter you can blur parts of the photo and thus emphasize the subject. In this Snapseed manual I will explain to you how to blur the background of a portrait.
The videos below explain how you can apply Lens Blur selectively. Go to tools and tap Lens Blur. Tap the circle at the bottom of your screen to switch between Elliptical and Linear. Select an area of the photo that you want to blur and then tap the check mark in the lower right to apply the filter. You can remove the applied Lens Blur, apply it selectively or make changes by tapping the left arrow at the top right and then selecting view edits. Select Lens Blur.
Snapseed Glamour Glow
This video explains how you can apply Glamour Glow to a photo of a sunset. Go to tools, tap Glamour Glow and then a preset. Swipe your finger up or down for the settings, and then swipe horizontally to increase or decrease them. Tap the check mark at the bottom right to apply the filter.
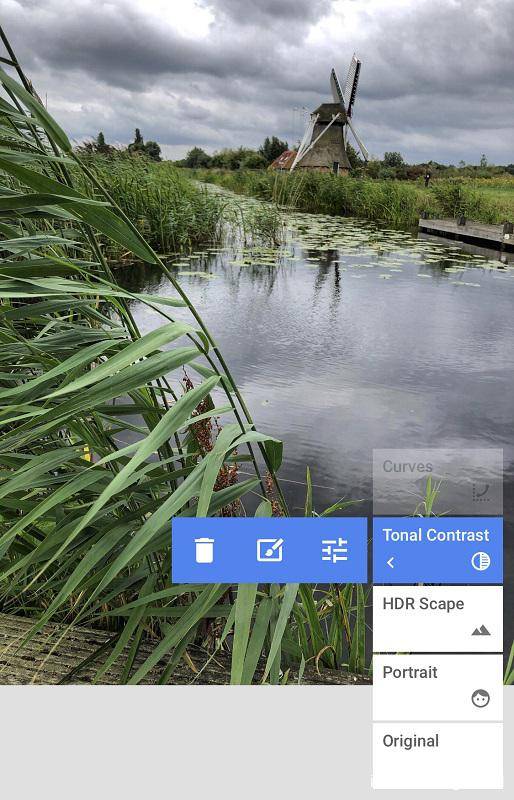
Tonal Contrast
With this filter you can add more contrast to the different shades. Go to tools and tap Tone Contrast. The default settings of the filter are applied. Swipe your finger up or down for the settings, and then swipe horizontally to increase or decrease them. Tap the check mark at the bottom right to apply the filter.
HDR Scape
Go to tools, tap HDR Scape and then a preset (nature, people, fine or strong). Swipe your finger up or down for the settings, and then swipe horizontally to increase or decrease them. Tap the check mark at the bottom right to apply the filter. You can remove the applied HDR Scape, selectively apply it or make changes by tapping the arrow on the top right and then selecting View edits. Select HDR Scape.
Grunge
Go to tools and select Grunge. Swipe your finger up or down for the settings, and then swipe horizontally to increase or decrease them. Tap the check mark at the bottom right to apply the filter.
Retrolux
Go to tools and select Retrolux. Swipe your finger up or down for the settings, and then swipe horizontally to increase or decrease them. Tap the check mark at the bottom right to apply the filter.
Noir
Noir is a black-and-white filter with which you can make your photos look like they were printed in a dark room.
Go to tools and select Noir. Swipe your finger up or down for the settings, and then swipe horizontally to increase or decrease them. Tap the check mark at the bottom right to apply the filter.
In the video below, the filter is applied selectively.
Make your photo sepia with the Noir filter.
Snapseed manual Black and white with one color
The video below explains how you can make a black-and-white photo with one color. Step 1. Make the photo black and white. Step 2. Selectively remove the black and white filter. Reed also my blog about Black and white filters.
Snapseed manual additional
Combining two filters.
Snapseed Histogram
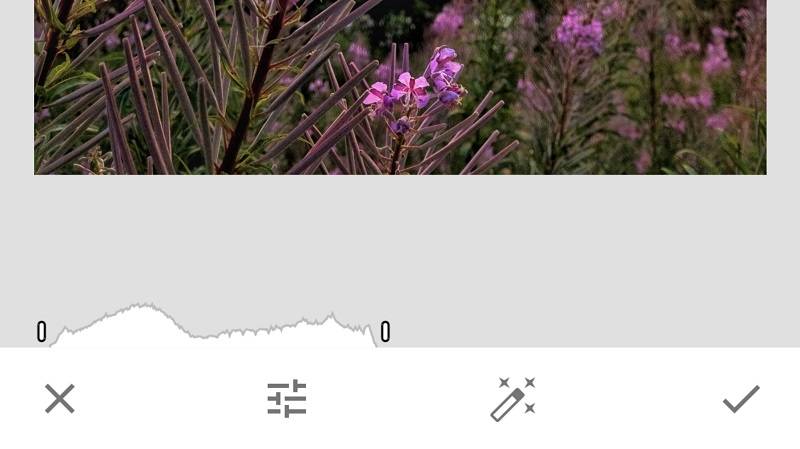
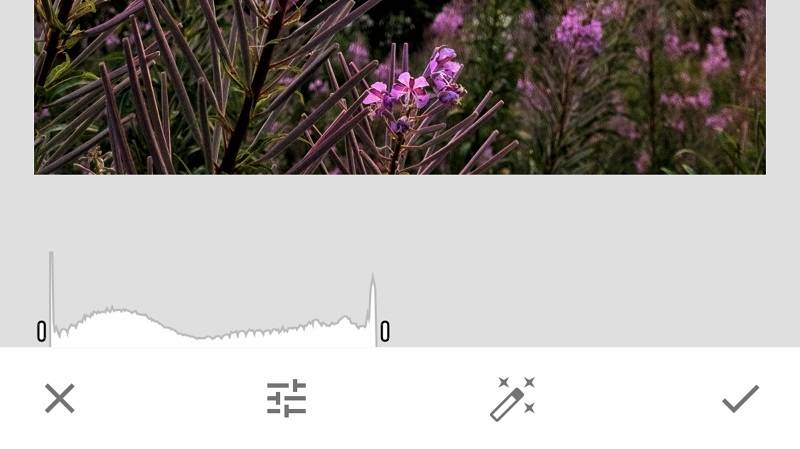
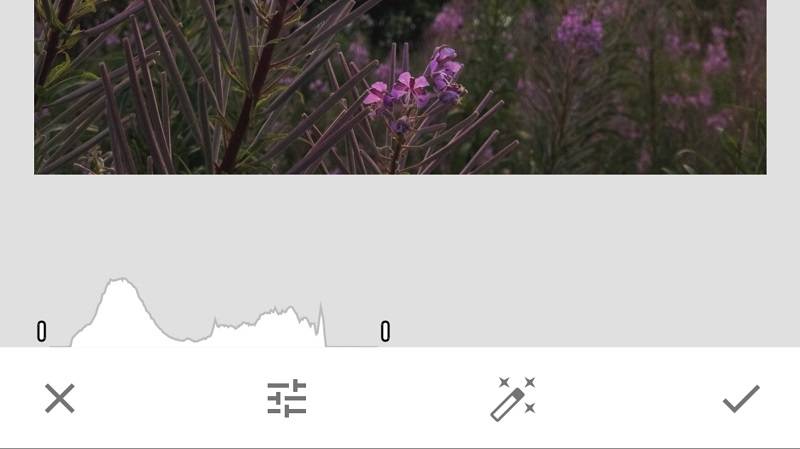
For the Snapseed histogram, go to Tune Image and tap the histogram sign in the lower left.
With a histogram you can see if the exposure of a photo is good and whether the shadows (left in the diagram) and the highlights (right in the diagram) still contain details. The left point is black and the right point is white. In between you see the brightness of the colors. In the first image, the histogram shows that the exposure is good; the line ends at the points. In the second image, the histogram shows that the photo is incorrectly exposed; the shadows and highlights are too dark and too light and therefore contain no details. In the third image, the histogram shows that the photo has too little contrast and the colors black and white are missing. You can change the histogram with the Adjust tool.
Snapseed manual editing RAW photos
In Snapseed you can import and edit RAW photos. After importing, the tool “RAW development” is automatically opened with which you can for example change the exposure and white balance.
Download
Snapseed (App Store)
Also read my blog about HDR iPhone photography or go to the overview with all iPhone photography blogs .