Introduction
Photographing the moon with your iPhone is difficult because it is too small for the automatic exposure. The dark sky around the very bright moon causes the moon to be overexposed. The result is a bleached moon without details. I tested three camera apps with my iPhone 8 Plus to see which one is best for taking pictures of the moon and how to use it.
I have photographed the moon with these iPhone camera-apps
- The iPhone camera-app
- NightCap Camera
- Adobe Lightroom CC Mobile
What do you need to take pictures of the moon with your iPhone?
To photograph the moon, you need a tripod with a smartphone holder. Your iPhone may not move during shooting because you use a slow shutter speed. Always shoot with the self-timer to further reduce the chance of camera shake. Use your telephoto lens if you have an iPhone with a dual camera.
How to take pictures of the moon with the iPhone camera-app
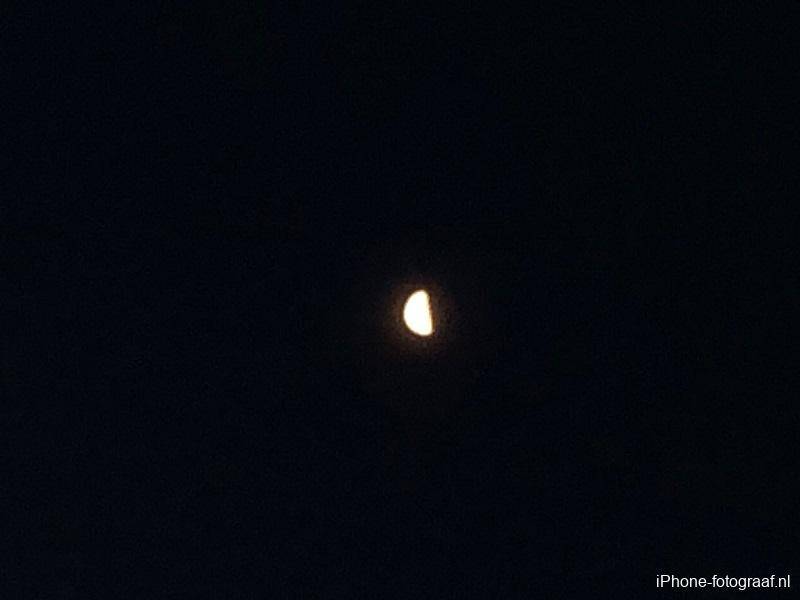
Open the iPhone camera app in photo mode. If you have a dual camera, you can switch to the telephoto lens by tapping on 1x. Tap on the moon to focus and to determine the exposure. Now swipe down with your finger to make the photo darker. Then take the picture with the self-timer.
How to take pictures of the moon with the iPhone app NightCap Camera
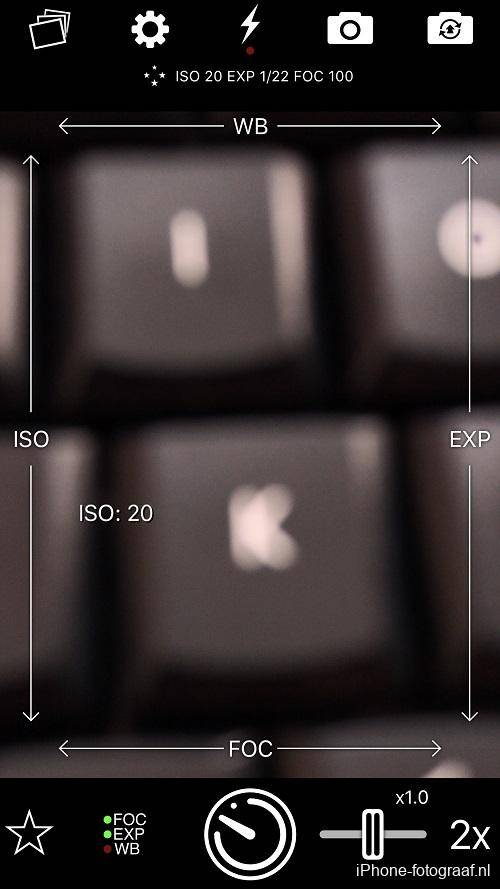
This app for shooting stars, has more manual settings than the iPhone camera app. You can, among other things, reduce the ISO value and thus reduce the noise.
The settings
If you have an iPhone with a dual camera, tap on 1x at the bottom right of the screen to switch to the telephoto lens. Select the Stars mode at the bottom left of the screen and lower the ISO to the lowest value by swiping your finger down on the left side of the screen. On my iPhone 8 Plus the lowest value is ISO 20.
Taking the picture
The focus is automatically set to infinity (FOC = 100) so that focusing is not necessary. If that is not the case, swipe with your finger to the right at the bottom of the screen. For exposure compensation swipe your finger down or up on the right side of the screen. When the moon is gray, tap the shutter button. In Stars mode, photos are taken automatically with the self-timer.
How to take pictures of the moon with the iPhone app Lightroom CC Mobile
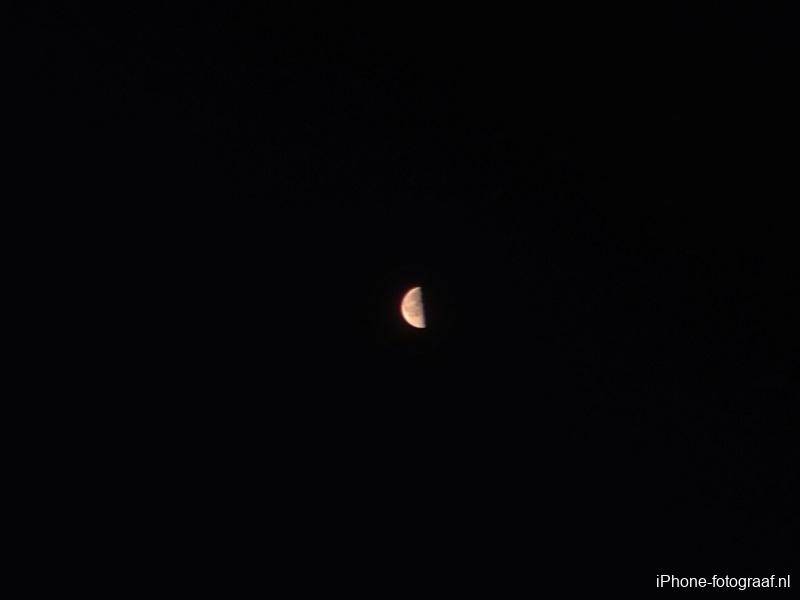
Lightroom CC Mobile has a long exposure mode, with which you can expose up to five seconds. The app then takes multiple photos in a row and merges them to one photo. From the iPhone 6S onwards you can select the RAW file format DNG.
The settings
You can select the Long Exposure mode on the left of the shutter button. The DNG or JPG file format is displayed at the top of the screen and can be changed by tapping on it. If you have an iPhone with a dual camera, you can tap the symbol to the right of the shutter button to switch between the wide-angle lens and the telephoto lens. You can select the self-timer in the settings by tapping the three dots at the top right of the screen.
Taking the picture
Tap the moon and swipe with your finger on the screen to the left to make the photo darker with the exposure compensation and take the picture. The photo is calculated and it may take a while before the photo becomes visible.
The results
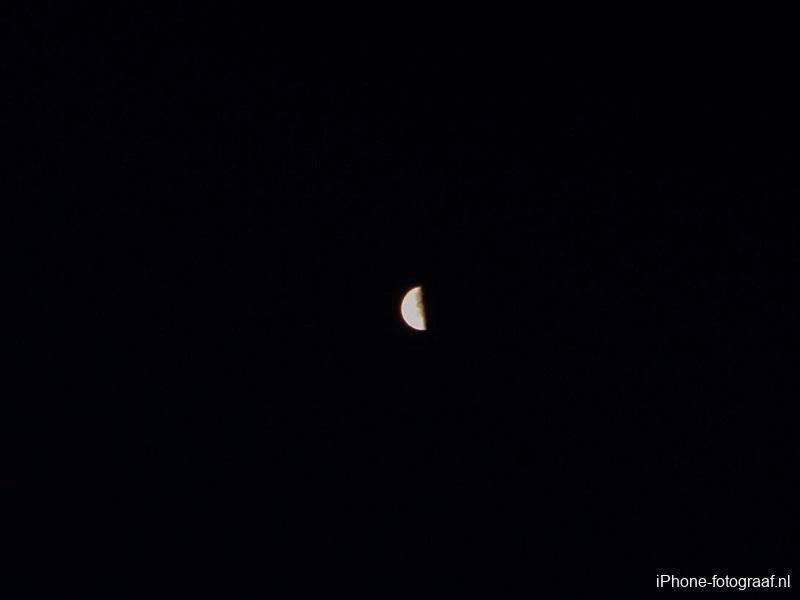
The moon was high in the sky and even with the telephoto lens it looked very small. It was early in the morning and it was twilight. I only succeeded with NightCap to photograph details of the moon. The result of Lightroom CC shows a bit of detail and the photo of the moon taken with the iPhone Camera-app photo is completely white.
Conclusion
The photo I took from the moon with NightCap was clearly the best. NightCap is easy to use; you only need to set the ISO value and take the shot.
Downloads
NightCap Camera App Store
Adobe Lightroom CC Mobile App Store
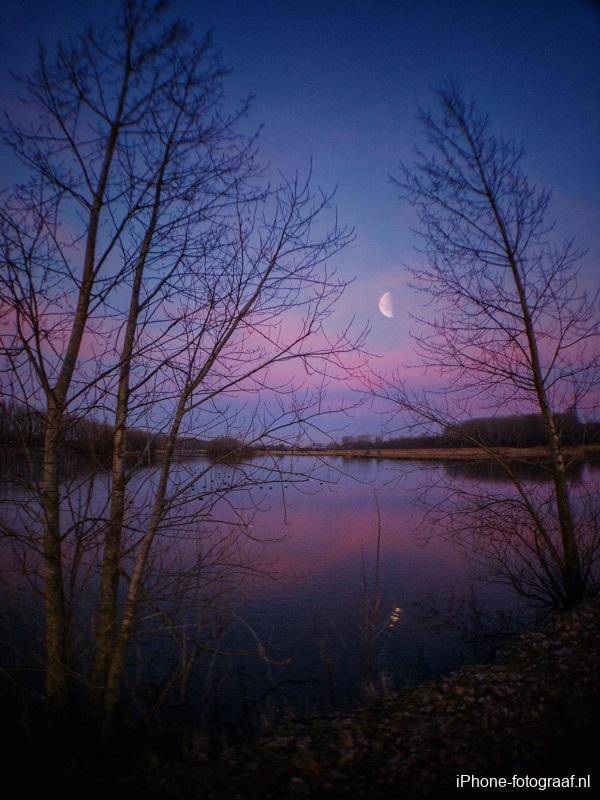
Operations in Snapseed
On the photo below, the moon was overexposed. In Snapseed (App Store) I used the tool “Double exposure” to replace it with the moon that was photographed with NightCap.
- First I made the moon bigger with the Crop tool and saved it.
- In the second photo I removed the original moon with the Healing tool and then opened the photo of the moon with the Double exposure tool. With my finger on the screen I dragged the moon to the right position.
Maybe you want to view my Snapseed manual for easy-to-follow instructions and video tutorials.
Read my blog about HDR iPhone photography or go to the overview with all iPhone photography blogs.