Introduction to RAW camera apps
Your iPhone comes with the iPhone Camera app that is well-organized and user-friendly. You have all the functionalities in one place and you can start the app in many ways; even without first unlocking your iPhone. However, with the iPhone Camera app you cannot take RAW photos and you cannot set the shutter speed and the ISO speed. Those are the two most important reasons for me to install other Camera apps.
iPhone Camera apps for RAW photography
There are many iPhone RAW camera apps in the App Store. The camera apps that I have installed are Manual, Camera+, CameraPixels, ProCamera and Lightroom CC Mobile (free). If you start with camera apps, you soon have multiple apps on your iPhone. Once you think you have found the perfect app, then that one function is often missing. The disadvantage of different camera apps is that you get too little experience with it. That is why, during photography, I often had to search through the various menus. For this reason I decided to use Lightroom CC Mobile and ProCamera for my RAW photography.
Make your iPhone RAW camera app quickly accessible
To begin with, it is important that you can launch your iPhone raw camera app quickly so as not to miss a moment. To quickly open Lightroom CC Mobile and ProCamera, I added the apps to the Today View.
You can open the iPhone RAW camera apps in the following ways
1. Add the camera apps as Widgets to the Today View, so that you can start Lightroom CC Mobile or ProCamera after you swipe right over the Home screen or Lock screen. To add the widgets, tap “change” in the day view. Unfortunately, not all apps have a widget.
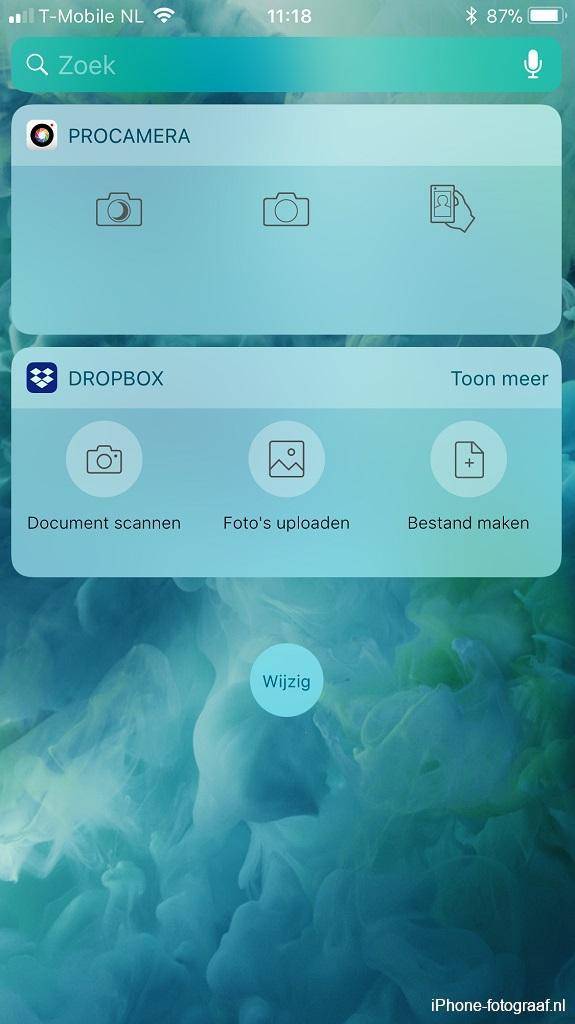 Start the app in the Today View. Start the app in the Today View. |
 Add a Widget to the Today View. Add a Widget to the Today View. |
2. From the Home screen (iPhone 6s and later) with 3D Touch. For 3D Touch you keep pressing the app icon until a screen with shortcuts appears, so you can choose in which mode you want to start Lightroom CC Mobile or ProCamera.
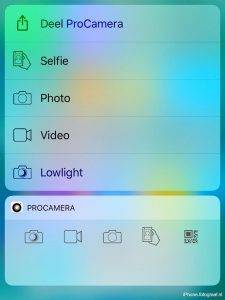
3D touch menu
3. Place the Camera apps in the Dock. The Dock is the bar at the bottom of your screen with space for four apps. You first drag an app away and then you can add the Camera app.
iPhone RAW camera app ProCamera
ProCamera has different modes between which you can easily switch. Of the standard available modes, I use the Photo and Lowlight modes. I do not need the Video, Selfie and Scan modes, because I prefer to use the iPhone Camera app for those functions. I removed these modes from the Camera Mode Selector, so that the app is easier to use and I can quickly switch between the Photo and Lowlight modes.
In the Photo mode (1st image) and Lowlight mode (2nd image) with RAW as the file format I use these functions:
- Rapid Fire Mode in which you can continuously and quickly take photos in RAW by holding down the shutter button.
- F/E Lock with which you can hold the exposure and focus points.
- Grid views that help you determine your composition.
- Auto exposure or Shutter-ISO-priority.
- Anti-Shake that helps you to make vibration-free photos. Especially recommended for RAW.
- Shutter speed buttons (Lowlight mode).
The function that I’m missing is bracketing, which enables you to take multiple photos with different exposures in quick succession. You can then choose the best exposed photo afterwards.
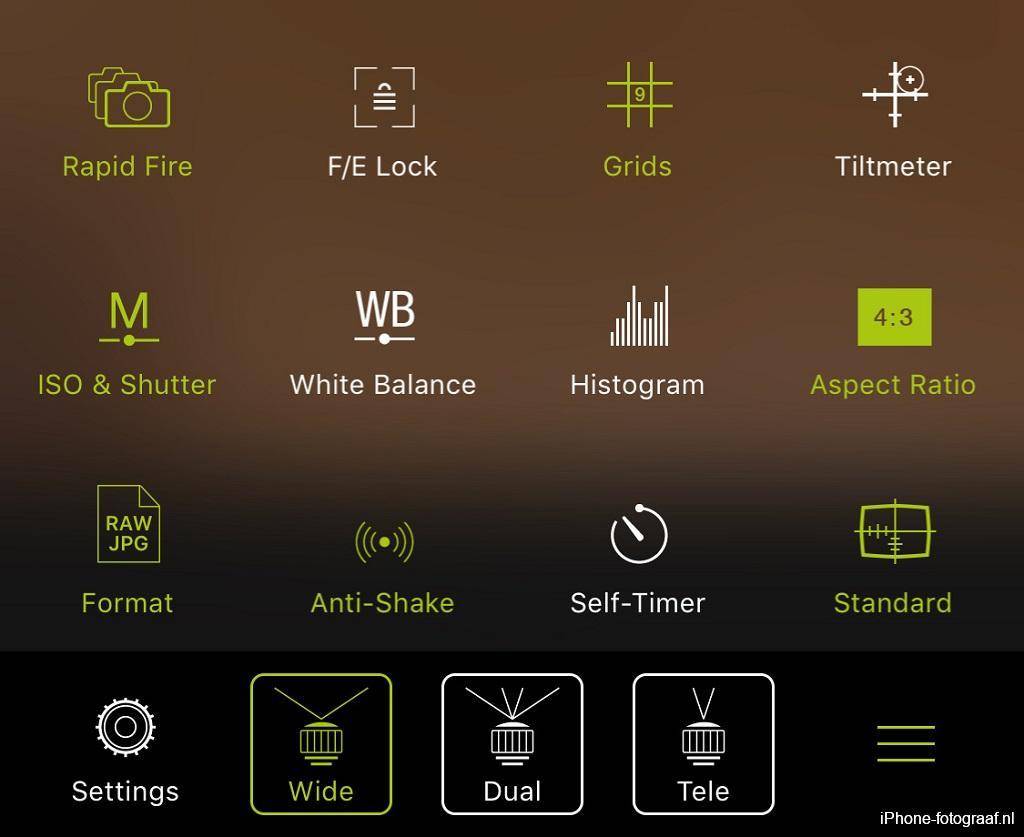
Fotomodus
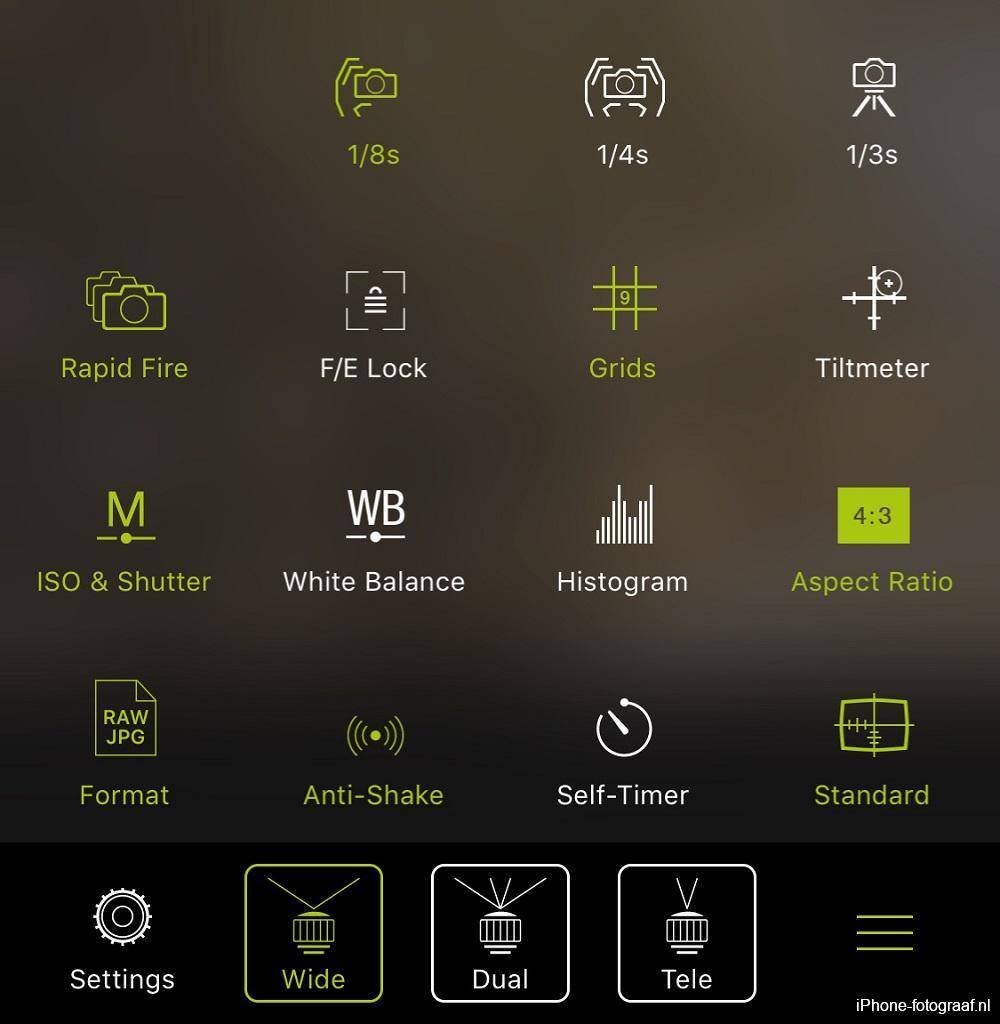
Lowlight modus
Focusing and exposing with ProCamera
iPhone RAW camera app Lightroom CC Mobile
With the camera and photo editing app Adobe Lightroom CC Mobile for the iPhone, you can shoot in five different camera modes. You can then crop the image, adjust the exposure, remove noise, apply filters and export the edited photo as a JPG. You can also export the original RAW photo. I often import the photo into Snapseed, for the application of specific filters and the conversion to black and white.
The camera modes
- Automatic.
- Professional. In this mode you can set the ISO and shutter speed.
- High Dynamic Range. The camera app takes 3 photos with different exposures and merges them into 1 well-exposed photo.
- Long Exposure (preview). The shutter speed is adjustable from 0.5 – 5 seconds.
- Depth Capture (preview). The photo is saved with a depth mask.
The Camera settings
Open Lightroom for Mobile and tap the camera at the bottom right.
Select a Camera mode
Select a Camera mode in the lower left corner. Automatic, Professional, High Dynamic Range (HDR), Long Exposure or Depth capture.
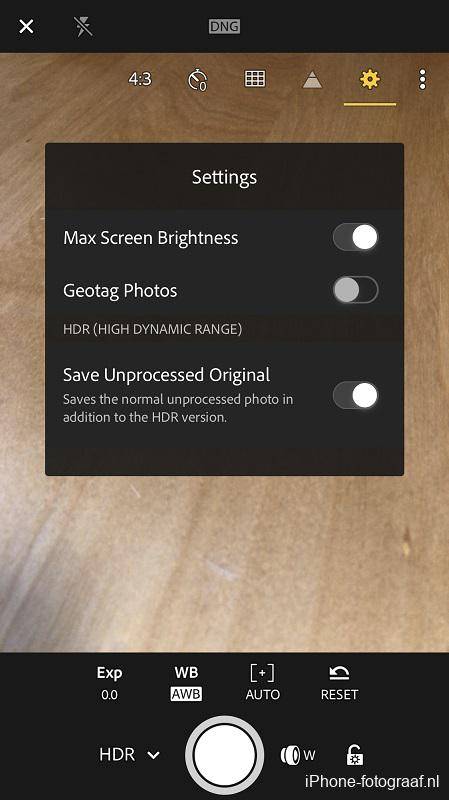
Save the unprocessed original
Tap the three vertically aligned points at the top right and than the gear to select -Save unprocessed original-. If an HDR photo is not successful due to fast movements, you can use the original.
Exposure Lock
During shooting you can activate the Exposure Lock by tapping the lock on the bottom right. You can then determine the composition without the camera changing the exposure.
Focus Lock
You can lock the focus by keeping your finger pressed on the screen until Focus Locked appears (Not available in Automatic).
DNG RAW
DNG RAW is the standard file format for the HDR mode. In the other modes you can switch between JPG and DNG by tapping the file type at the top of the screen. HEIC is available in Depth Capture mode.
Exposure Compensation
Swipe your finger horizontally across the screen for Exposure Compensation.
Reset the camera settings
Tap the arrow to reset all settings to the default settings.
Shutter speed
In the Professional mode you can change the shutter speed and ISO.
White balance and focus
In the Professional, High Dynamic Range, and Long Exposure modes, the white balance (WB) is adjustable and you can focus manually ([+])
Settings screen
For the settings screen, tap the three vertically aligned dots at the top right. In all modes you can use Highlight Clipping (not in HDR), turn on the Timer and the function Level and determine the aspect ratio. With Highlight Clipping (pyramid icon) the overexposed areas are shown during shooting, so that you can correct them with the exposure. With the Level function you see an extra line that is interrupted when the horizon is skewed during shooting. The line turns yellow and you feel a vibration when the horizon is straight.
Video: Shooting in HDR mode
Photos viewer
After taking the photos, you can view them by tapping the cross in the top left to close the camera. The processing of an HDR photo takes about 10 seconds on my iPhone 8 Plus. The original unedited photo is immediately visible.
RAW
If you take RAW photos, the iOS image stabilization system and digital zoom are not available. You can optically zoom on iPhones with a double camera with the 1x and 2x buttons. Also the optical stabilization of my iPhone 8 Plus is not available when I make RAW photos. ProCamera has an Anti-Shake function that works with the RAW file format.
My conclusion about RAW camera apps
Lightroom CC Mobile and ProCamera are easy to use and have many dslr like functions. Because of the modes High Dynamic Range and Long exposure with the file format RAW, I usually use the free app Lightroom CC Mobile. I use ProCamera to take RAW photos in quick succession with the Rapid-fire mode. If you are looking for a bracketing function then you could consider CameraPixels.
Camera app downloads
Manual App Store
Camera+ App Store
ProCamera App Store
Adobe Lightroom CC Mobile (Free) App Store
CameraPixels App Store
Read also my blog about HDR iPhone photography or go to the overview with all iPhone photography blogs.