Introduction
With the pano mode of the iPhone Camera app, you can easily create beautiful panorama photos. It is no longer necessary to stich photos together with an app. The camera takes multiple photos that are then automatically merged into one image. In this blog I show you examples of vertical and horizontal panorama’s and tell you how it works.
Examples of panorama iPhone photos
Panorama photos are useful if the subject does not fit into the image or for landscapes and sunsets. You can also try to create vertical panorama photos.
Landscape
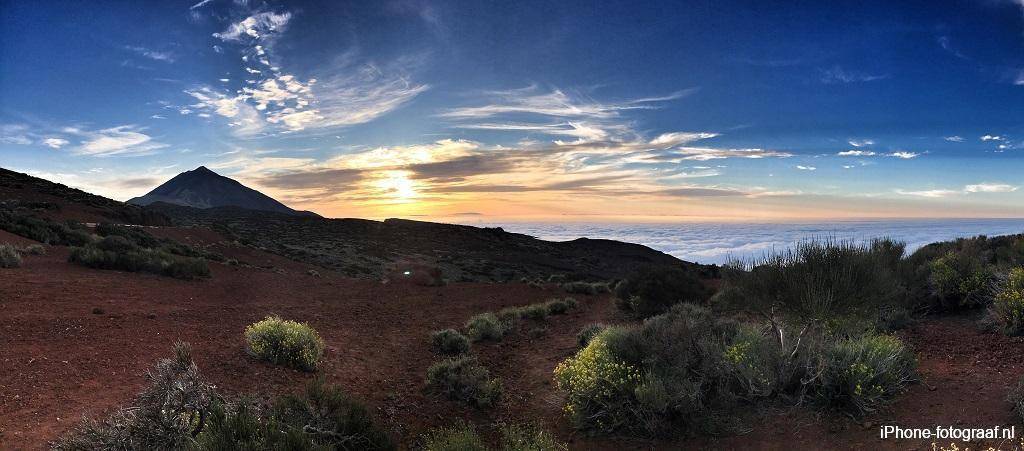
Volcano El Teide on Tenerife
iPhone vertical panorama
I made this vertical panorama photo of the Sagrada Familia in Barcelona by keeping the iPhone horizontal and moving it from the bottom to the top. When creating panorama photos of buildings, it is important that you take the photo from a distance to avoid distortion.
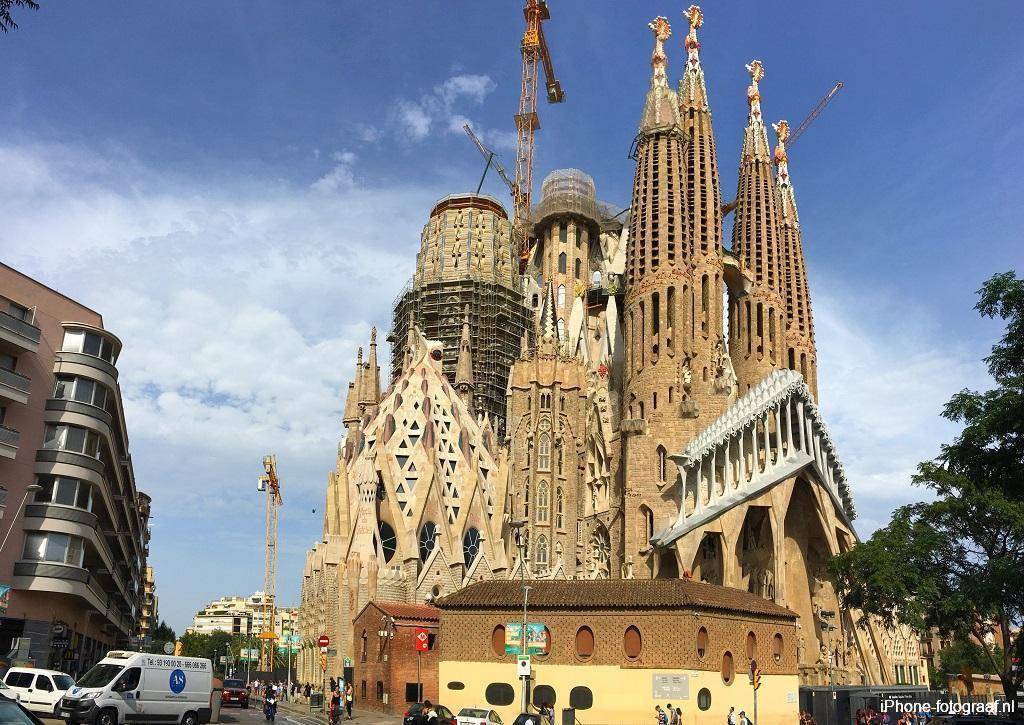
A vertical panorama photo of the Sagrada Familia in Barcelona.
Panorama iPhone photo of a group of people
If not everyone from a group fits in the picture.
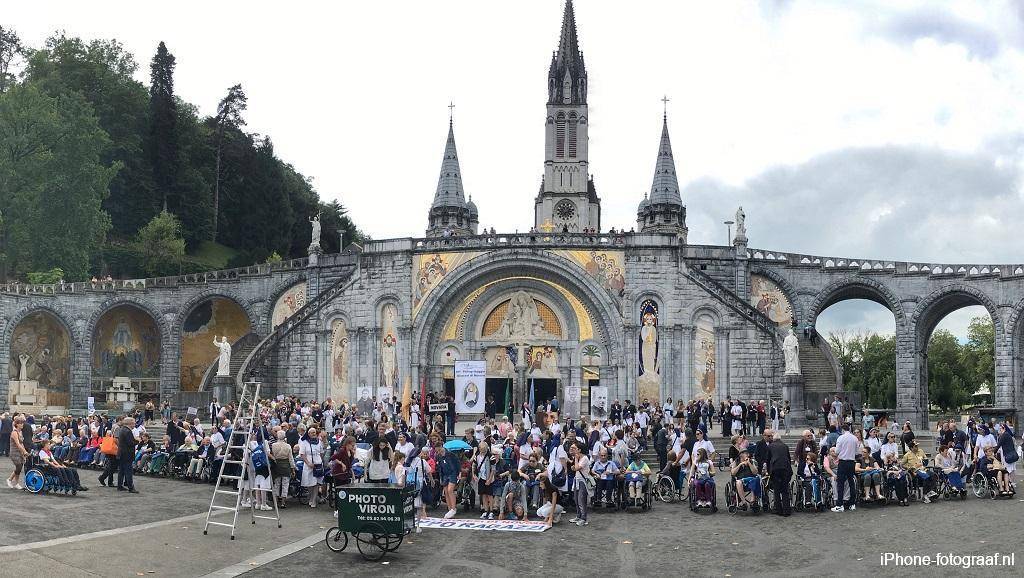
Lourdes
A panorama of an large object that stands inside
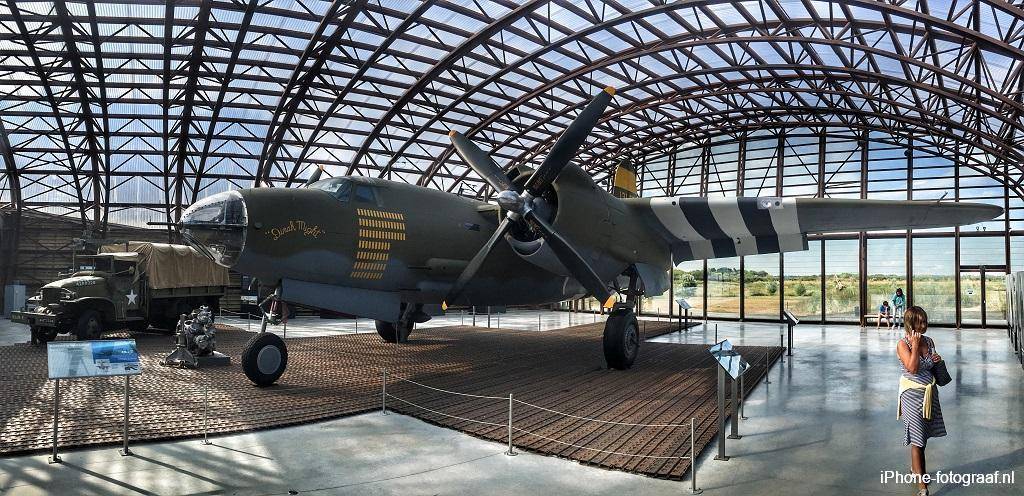
Bomber in the Utah Beach D-Day Museum.
Edit iPhone panorama photos
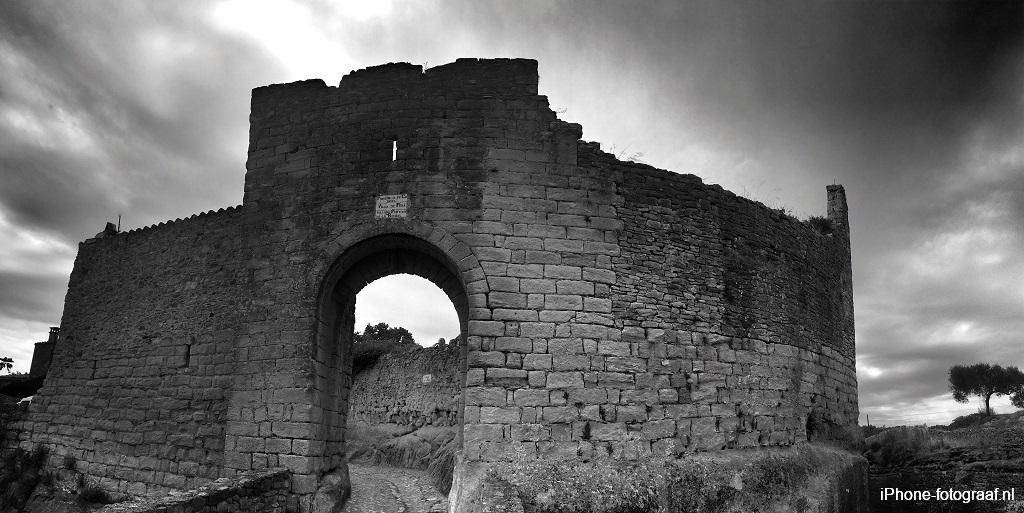
The panorama photos can be edited in the same way as ordinary photographs. Unfortunately it is not possible with the iPhone Camera app to create RAW files. I have edited the examples in Snapseed (App Store) with the cropping tool and used filters. I have converted this panorama photo of a medieval gate with Snapseed to black and white.
How it works.
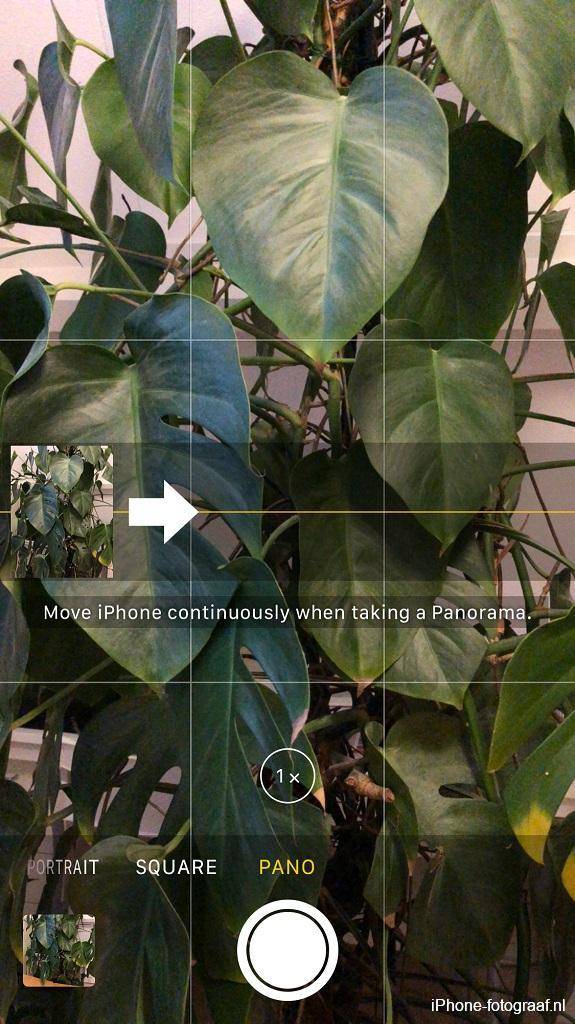
Open the iPhone Camera app of your iPhone and slide your finger to the left to select the Pano mode. An arrow to the right appears. Hold the device vertically and aim the camera at the subject. Start recording with a tap on the camera button and move your iPhone to the right in a smooth motion. Keep the arrow on the yellow line. If you go too fast a message “slower” comes into the picture. Stop recording with the camera button or by moving the iPhone quickly to the left. You can change the direction of the recording by tapping the arrow. For the panorama photos, a separate album is created in the Photos app so that you can easily find them.
AE / AF lock
If necessary, use the AE / AF lock in difficult lighting conditions with large differences between dark and light. Tap on the subject and hold your finger there until the message AE / AF lock comes into view. The exposure and focus do not change anymore and you can take the picture. You can cancel the lock by tapping on the screen again.
Conclusion
I have overlooked this functionality for a while but am now enthusiastic about the possibilities and results. I recommend you to experiment with the Pano mode of your iPhone.
Read also my blog about HDR iPhone photography or go to the overview with all iPhone photography blogs.