Landscape photography is one of the most popular photography genres and with my iPhone 8 Plus I regularly go out to make them. I cycle around in the surroundings, just before sunset or very early in the morning during the golden hour, in search of beautiful compositions. In this blog I have collected 16 iPhone photography tips for photographing landscapes with your iPhone and added some of my photos as an example.
1. iPhone landscape photography during the golden hour
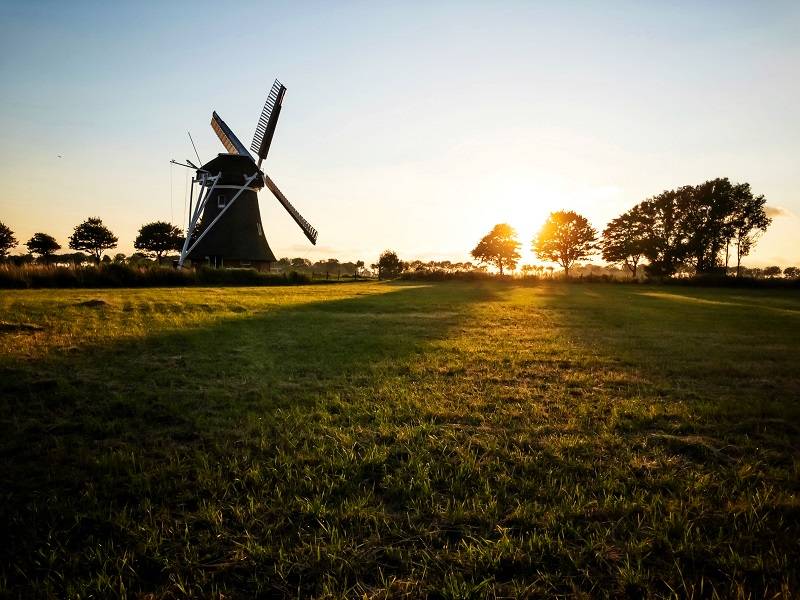
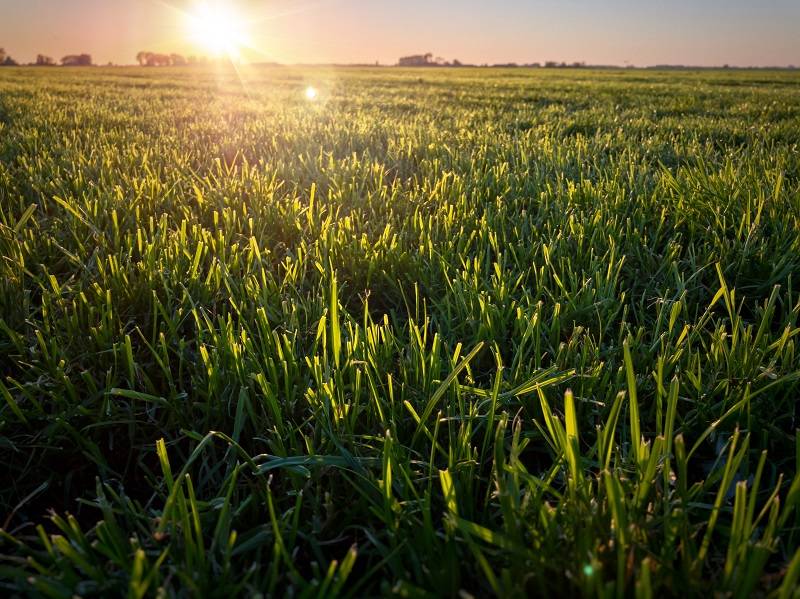
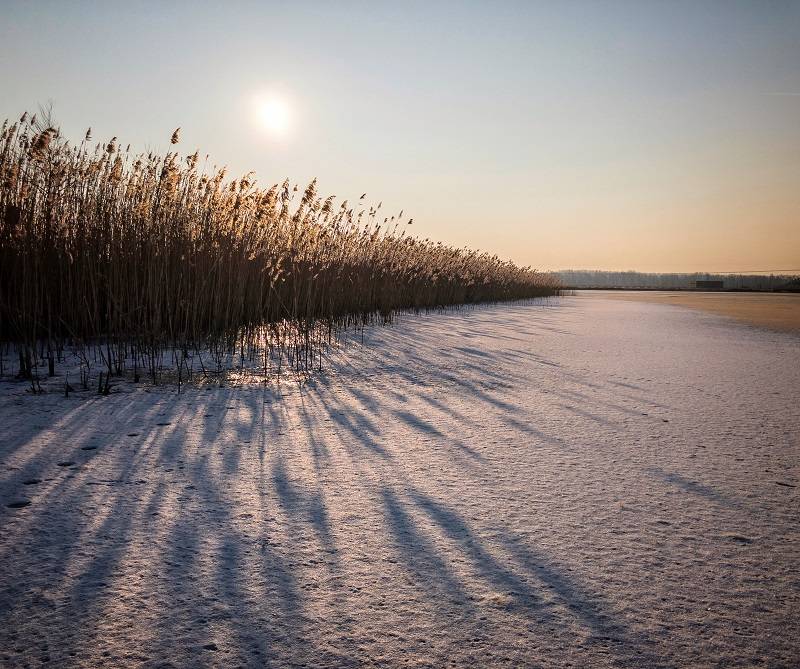
The hour after sunrise or before sunset is called the golden hour because of the warm yellow light. The shadows are longer and give depth to your photo. The colors are richer and the warm light gives you atmospheric landscape photos. The photo below of the Krimstermolen was taken when the sun was just above the horizon. The long shadows of the trees have created leading lines that draw the viewer’s eye into the photo.
2. Find locations for your iPhone landscape photography
It is important that you know your own environment well. I cycle a lot and am a runner. When I see a nice location I remember it so that I can go back to it during the golden hour. Sometimes I come back several times, until the circumstances are good for a successful photo. If you are somewhere where you still need to explore the surrounding area, you can use the handy TPE app.
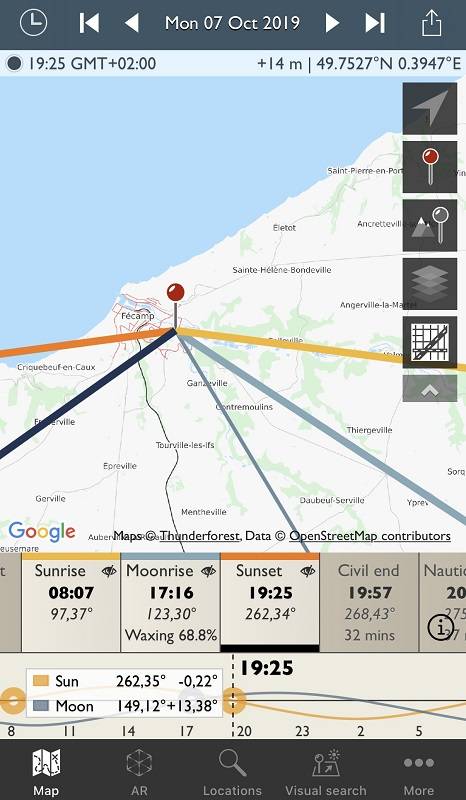
The iPhone landscape photography app TPE
With the app The Photographer’s Ephemeris you can see what time and where the sun rises or sets. This is especially useful if you do not know the area, for example at your holiday destination.
3. Take HDR iPhone photos and photograph landscapes in RAW
HDR (high dynamic range) ensures that the details in the light and dark parts of your photos are preserved. Your iPhone takes multiple photos with different exposures in quick succession and merges them into one well-exposed photo. The colors stand out better, you have more details and you get nicer cloudy skies. You can enable HDR in the camera app settings.
With the camera app Adobe Lightroom CC Mobile you can select the RAW file format DNG in High Dynamic Range mode. A number of photos on this page were made with the High Dynamic Range mode in RAW. RAW photos are better suited to edit than JPGs. If you like to edit your photos, you could experiment with Lightroom CC Mobile.
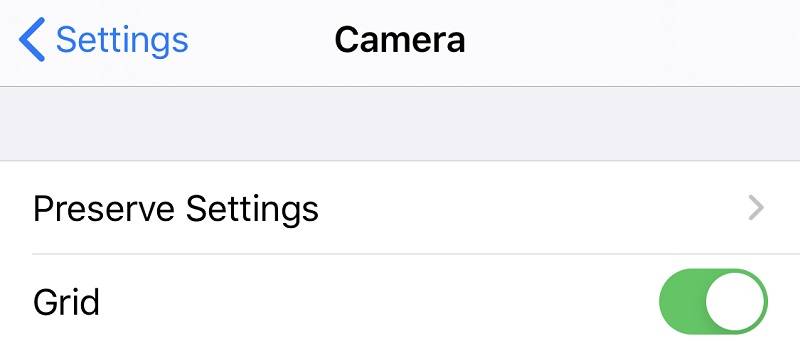
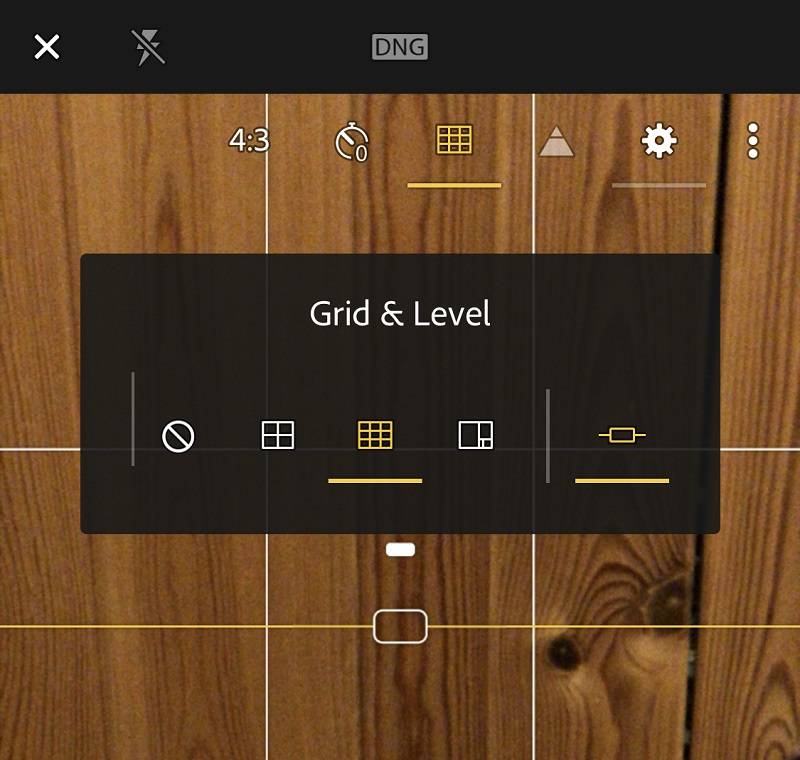
4. Make sure the horizon is straight
If you take a landscape photo with a clear horizon, then it is important that it is straight. You can do that afterwards with a photo editing app like Snapseed, but it is better to pay attention to it while shooting. Fortunately, you have handy tools in camera apps to keep the horizon straight. In the iPhone camera app you can turn on the grid and use a horizontal line to straighten the horizon. Go to the settings and then to the camera app and switch on the grid.
With the Adobe Lightroom CC Mobile app you can turn on the Grid and the Level feature. With Level you see an extra line during shooting that is interrupted when the horizon is crooked. The line turns yellow and you feel a vibration when the horizon is straight. The Level function is especially useful if you do not have a clear horizon. To turn on the grid and Level, open Adobe Lightroom CC Mobile and tap the camera icon at the bottom right. Then tap the three dots at the top right and then the grid symbol. Tap on a grid and then tap Level to enable these functions.
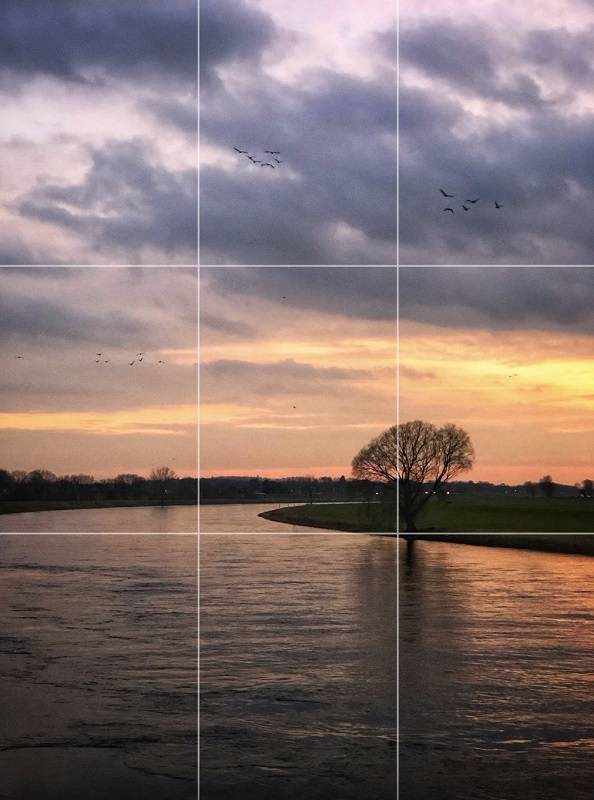
5. Apply the Rule of Thirds to your iPhone landscape photos
You can also use the grid as a tool to apply the Rule of Thirds. With the Rule of Thirds you can improve the composition of your photo. According to this rule, the image is divided into 9 equal parts with two vertical and two horizontal lines. By placing your subject on or near one of the four cross points, you make the photo more interesting.
This video explains how to enable the grid and apply the Rule of Thirds.
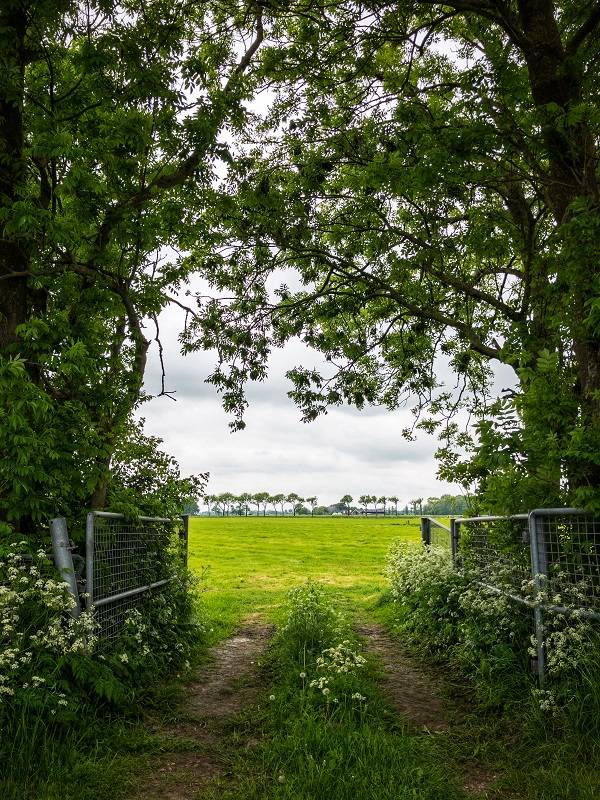
6. Use natural frames for your iPhone landscape photography
With a natural frame you can make a border around your landscape, to emphasis your main subject.
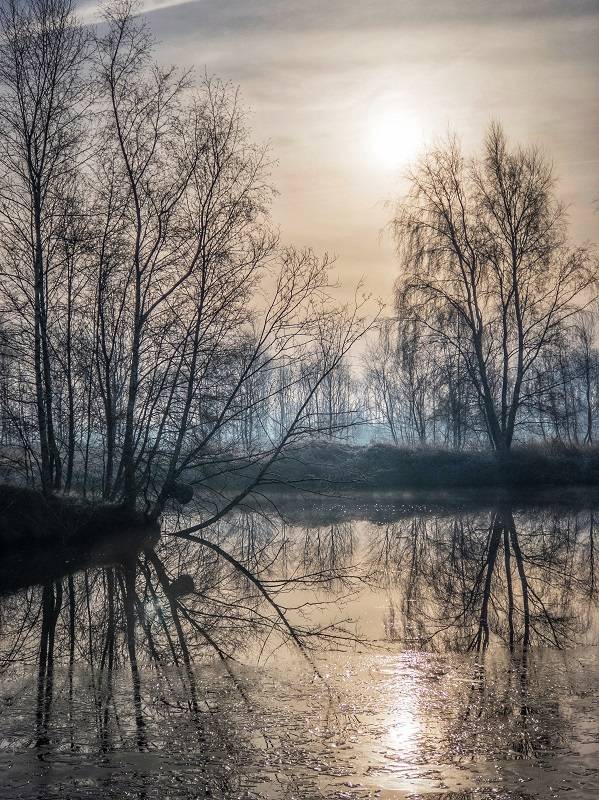
7. Search for reflections
The photo below of a flowering Japanese Cherry was taken during the golden hour. The trees reflect beautifully in the still water and the canal leads the eye to the distance. The photo was taken with the Long Exposure Time mode of Adobe Lightroom CC and a shutter speed of 2 seconds, so that the water became smooth.

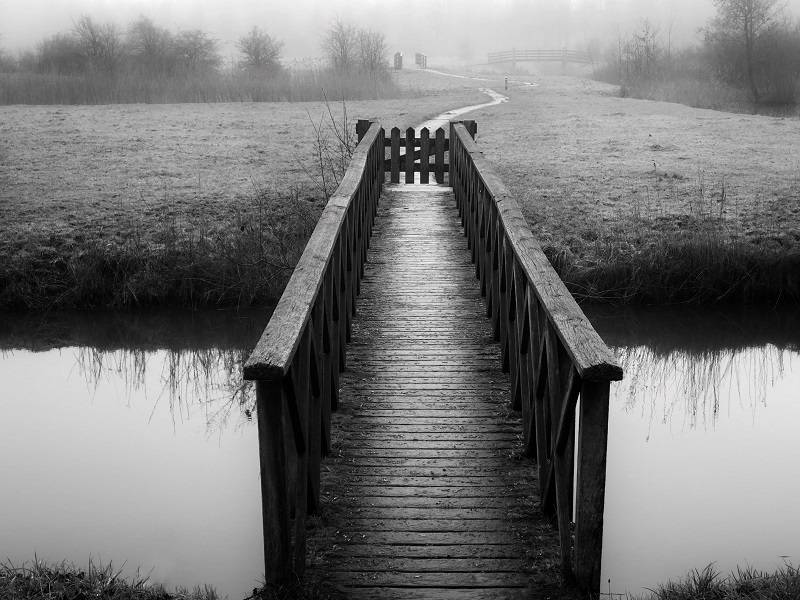
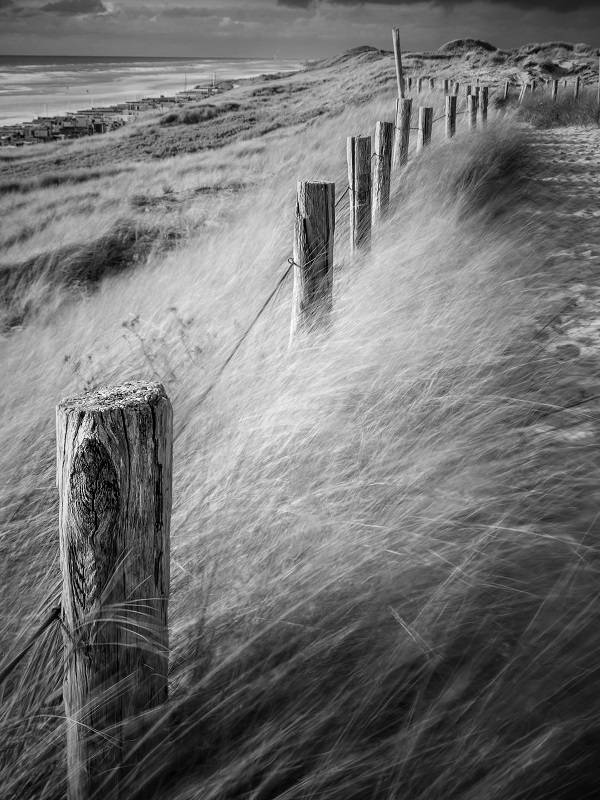
8. Use Leading Lines for your iPhone landscape photography
With Leading Lines you guide the viewer’s eye through the photo and they create depth. You can emphasize the subject of your photo by letting the lines point to it. Canals, rivers, roads, stairs, railways, etc. can be Leading Lines. On the photos of this page you can see many examples of Leading Lines.
9. Create panoramas of landscapes with the iPhone camera app
The Panorama mode of the iPhone camera app automatically sticks multiple photos together.
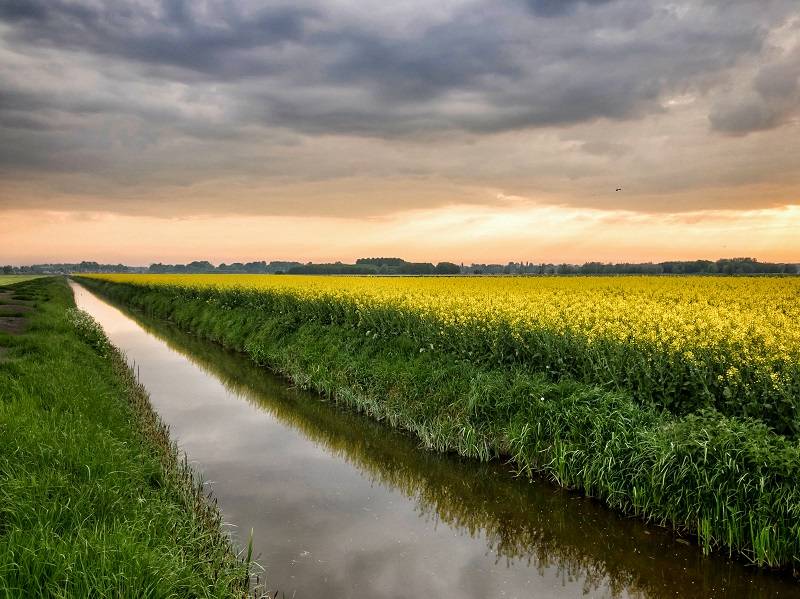
10. Photograph a lot of sky when there are beautiful clouds.
Photograph a lot of sky when there are beautiful clouds and fill the majority of the frame with the ground when the sky is dull. Fill the beautiful sky or the beautiful surroundings with 2/3 of the photo.
11. Experiment with different points of view
A low point of view can be more interesting than a photo taken at eye level. You can also photograph from a high point of view, for example from a viaduct or bridge, so that you can show more of the landscape. The photo of the Japanese Cherry was made from a bridge. Experiment with your point of view while shooting.
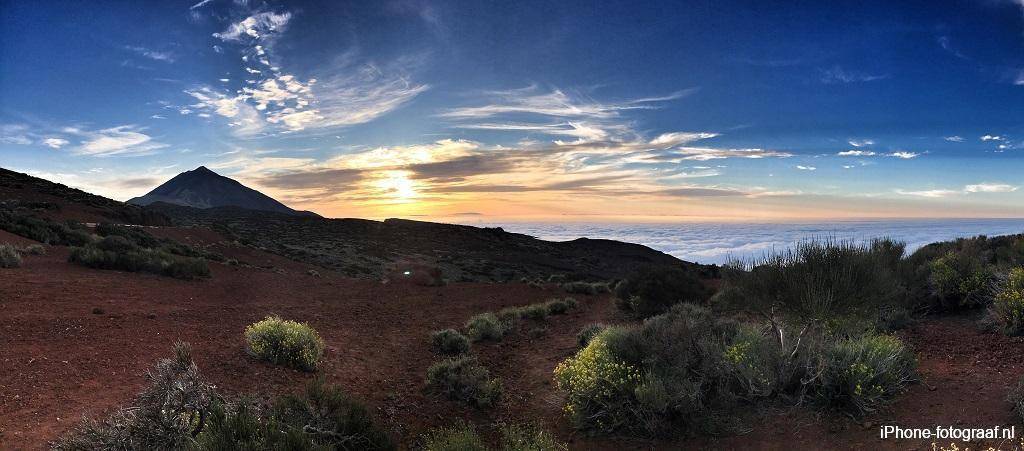
12. Photograph landscapes against the light with your iPhone.
By photographing against the light, you get beautiful silhouettes and long shadows that provide depth. Sometimes you see some lens flare with a green dot. You can prevent this by pointing your iPhone up or down a bit more or holding your hand above the lens. You can easily remove the green dot afterwards with a photo editing program. On this page you see several photos that were taken against the light.
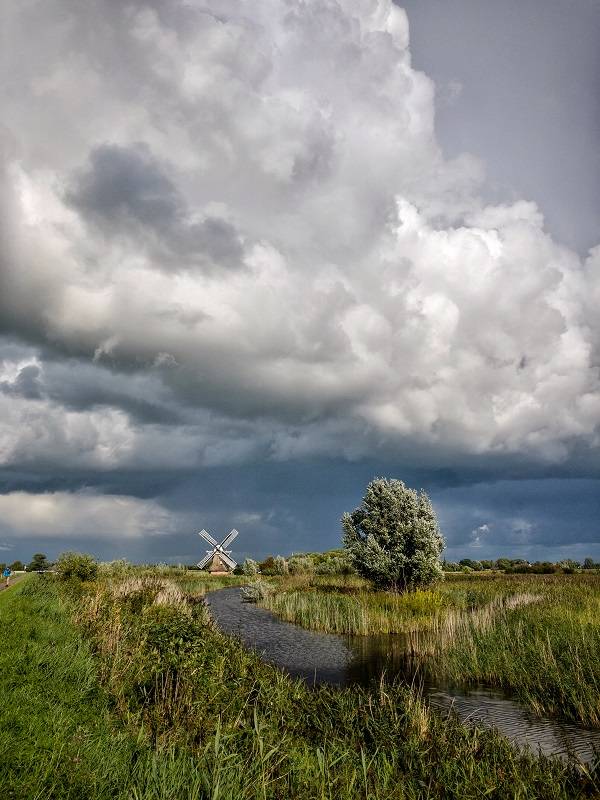
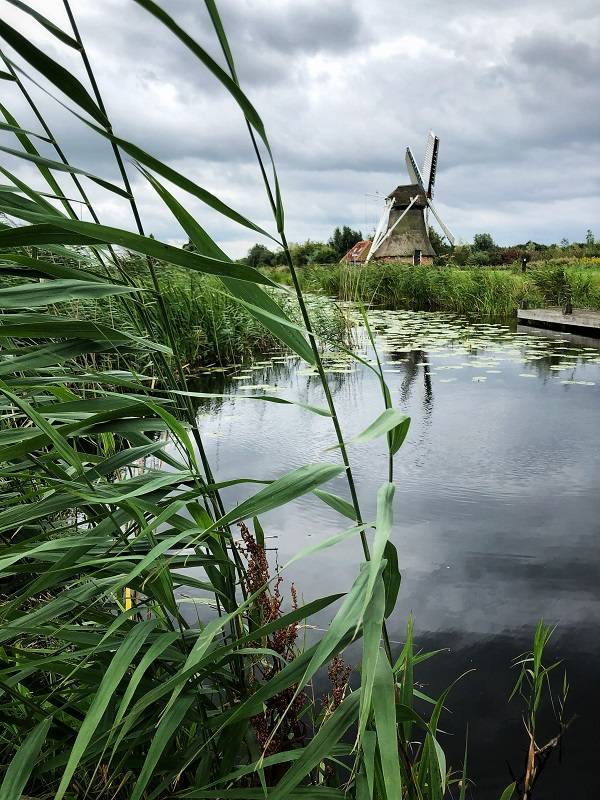
13. Find an interesting foreground
With a foreground you give depth to a photo. You can think of plants, flowers, a person, etc. The reeds in the photo below give depth and the leaves form Leading Lines that point to the mill.
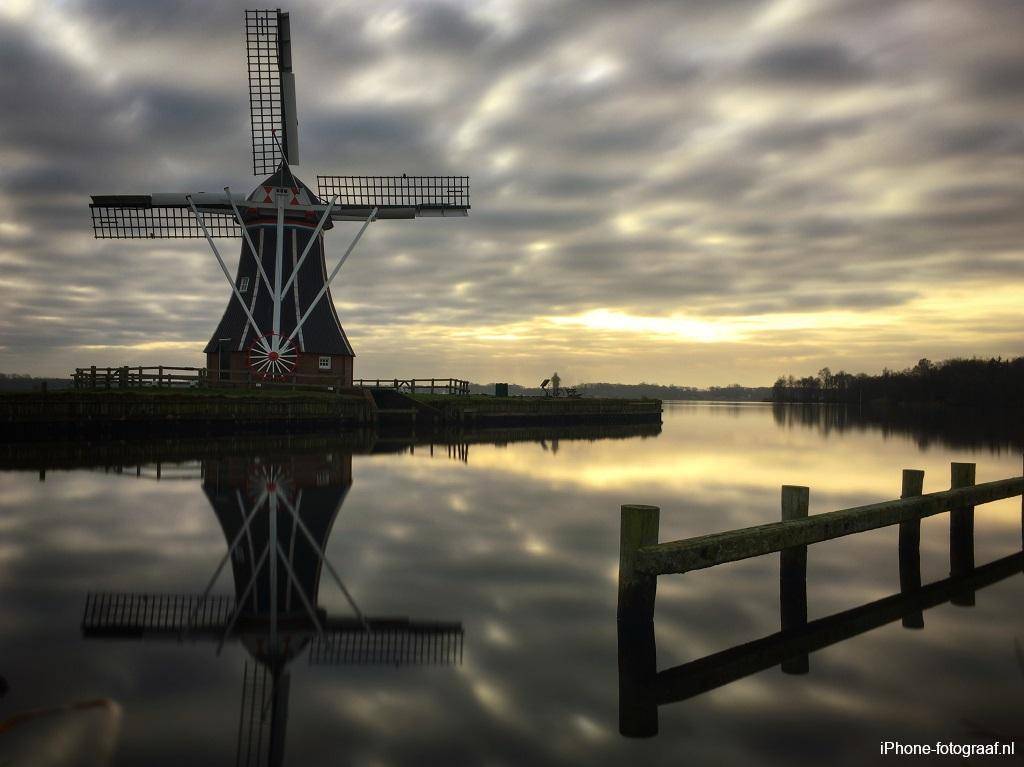
14. Photograph landscapes with a slow shutter speed
With a slow shutter speed, motion is blurred and you can make landscape photos extra atmospheric. Take a shutter speed of a few minutes so that the clouds become stripes and the water becomes smooth and reflective. You can read how to do this in this blog about long exposure.
15. Photograph landscapes with the telephoto lens
Also use the telephoto lens of your iPhone. By zooming in with the 56 mm lens, you can photograph details of the landscape without cropping. You can crop the photo afterwards, but that is at the expense of quality. The background is also displayed larger, for example, mountains appear much larger.
16. Take photos of landscapes with an ultra wide-angle lens
With an ultra wide-angle lens you get more in the picture. By photographing your subject in the foreground with an ultra-wide angle lens, you can show more of the surroundings. The iPhone 11 series has a camera with an ultra wide-angle lens. External wide-angle lenses are available for earlier models.
Edits in Snapseed
My workflow in Snapseed of landscape photos usually consists of applying a Look and straightening the horizon with Rotate. I remove disturbing details with the Healing tool. Then I darken the corners with the Vignette tool.
Downloads
Adobe Lightroom CC Mobile App Store
Slow Shutter Cam App Store
Snapseed App Store
The Photographer’s Ephemeris App Store
Also read my blog about black and white photography or go to the overview with all iPhone photography blogs.