Why do you need a special iPhone app for taking pictures of the stars?
The light of stars is very weak and therefore it is difficult to photograph them. With an SLR camera, you can increase the amount of light that falls on the sensor with the aperture, set a slow shutter speed in seconds or minutes, and increase the sensitivity of the sensor with the ISO value. The possibilities to adjust the exposure of the iPhone are very limited; the aperture is not adjustable, the longest shutter speed is 1/3 of a second and the ISO value is a maximum of 2000. Due to these limitations, I have not been able to take night sky photos with the standard iPhone Camera app and my iPhone 8 Plus. In this blog I will explain how to take pictures of the stars with your iPhone and special camera apps.
Update: I have taken night sky photos with an iPhone 11 and the result has been added.
Apps for taking night sky photos with your iPhone
In this blog I show you the results that I have achieved with the apps Slow Shutter Cam and NightCap. These apps simulate a long shutter speed, by quickly taking photos in a row and merging them into one photo.
How to take iPhone pictures of stars with Slow Shutter Cam
With the app Slow Shutter Cam, after some experimenting with the different modes and settings, I managed to take night sky photos.
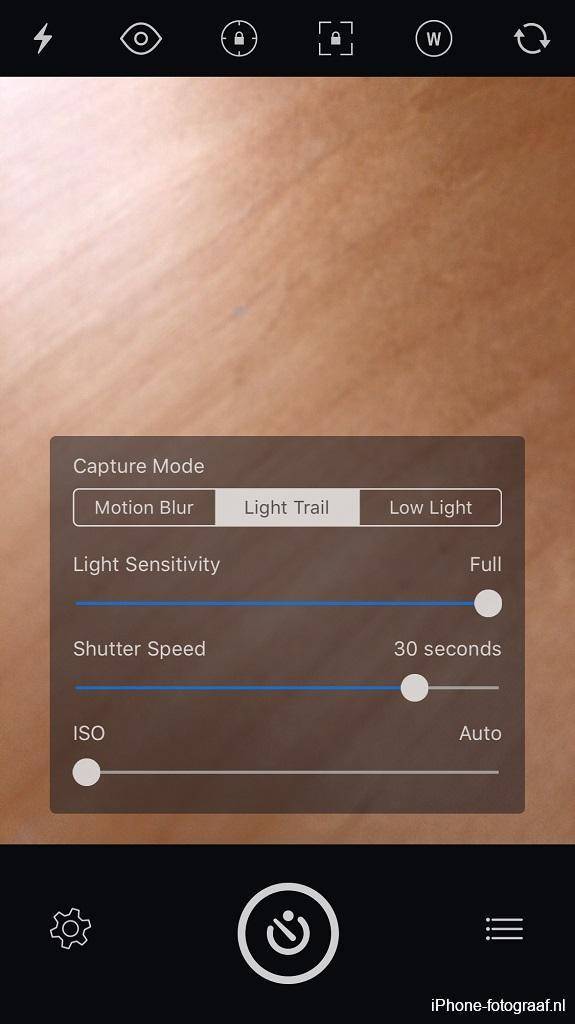
The app has three modes. I use the Motion Blur mode to capture motion blur with a slow shutter speed. Slow Shutter Cam also has modes for shooting under low light conditions (Low Light) and photographing light trails (Light Trail).
I found the Motion Blur and Low Light modes useless for taking night sky photos. These modes produced photos without stars (Motion Blur) and photos with extreme noise (Low Light). With the Light Trail mode I finally made this picture of the constellation Orion.
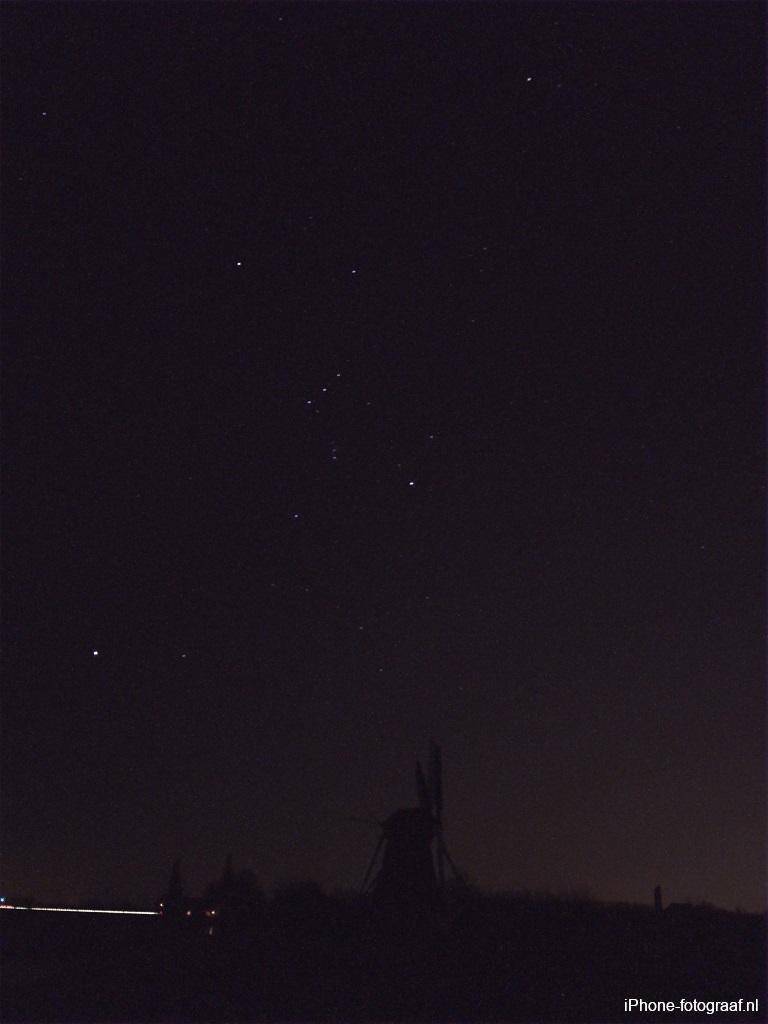
Made with Slow Shutter Cam.
Settings for taking night sky photos
The Light Sensitivity was set to Full with an exposure time (Shutter speed) of 30 seconds. The focus can not be set to infinity. Instead, I focused on a bright star by tapping and then locked the focus point with tapping on AF.
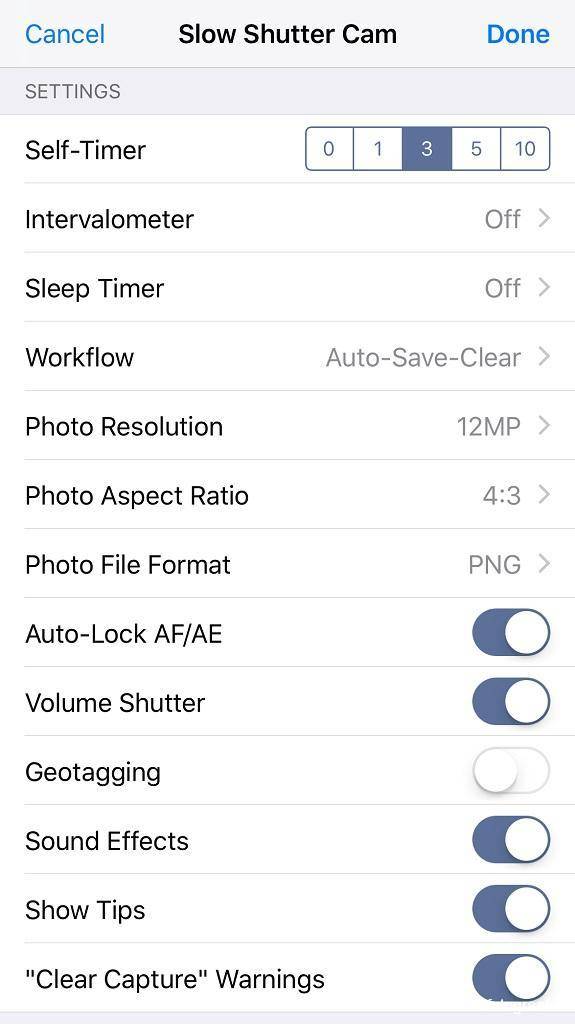
To prevent camera shake, place the iPhone with a smartphone holder on a tripod and take the photo with the self-timer. Set the resolution at 12 MP and as a file format you select TIFF or PNG for the best quality. As a workflow you select auto-save-clear, so that photos are immediately saved and the app is ready for the next recording.
 |
 |
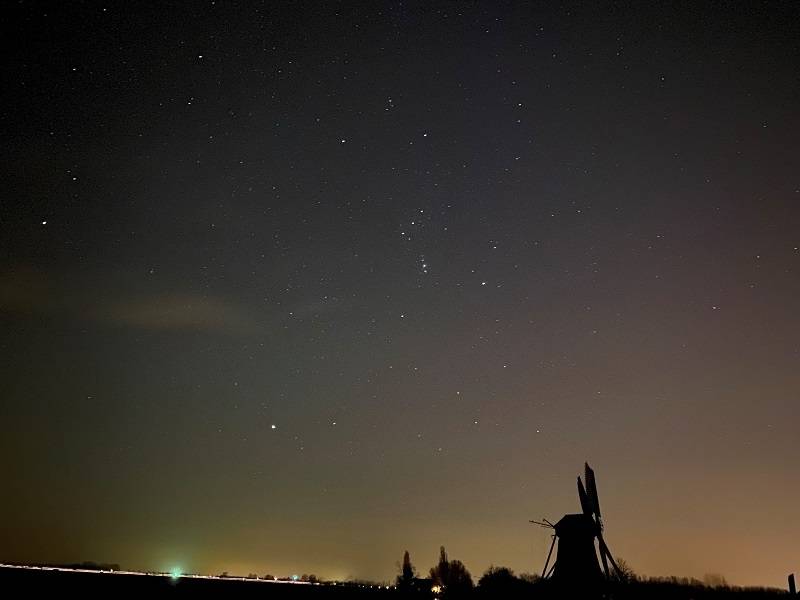
How to take iPhone pictures of stars with NightCap
This app has modes for stars, star trails, the International Space Station (ISS) and meteors (shooting stars). The Stars mode works completely automatically. The self-timer is set and the exposure is automatically determined. Even focusing is not necessary. All you have to do is place your iPhone on a tripod with a smartphone holder and tap the shutter button. The picture below is made with the Stars mode and an exposure time of 10 seconds.
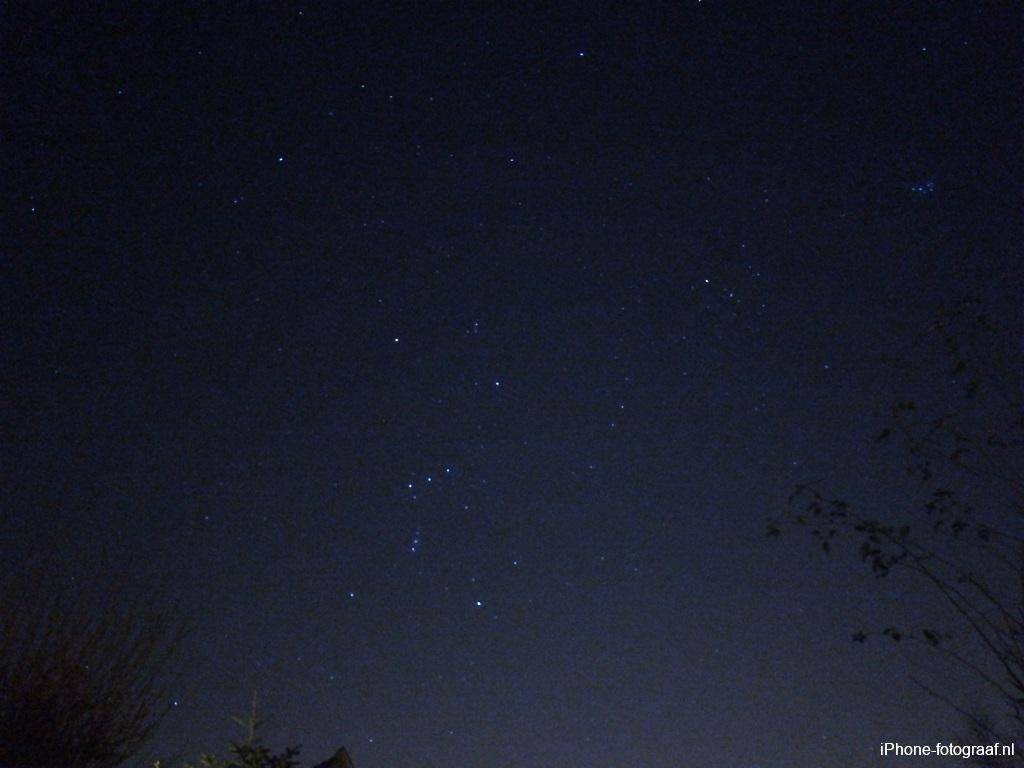
Made with NightCap.

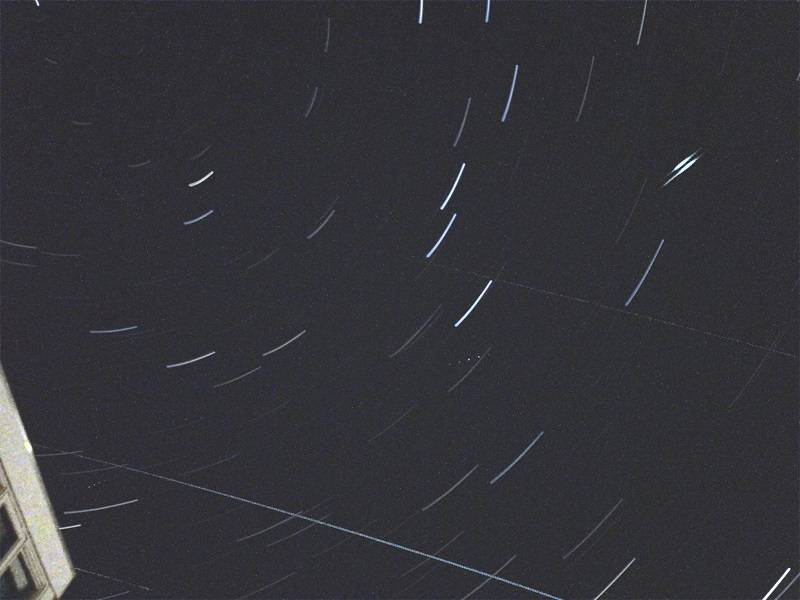
How to photograph star trails with the iPhone app NightCap
Due to the rotation of the Earth and a slow shutter speed, stars are sometimes shown on photos as star trails. In the Northern Hemisphere, the North Star is always shown as a dot and the stars appear to move around it.
With the Star trails mode of the iPhone camera app NightCap you can photograph star trails. Place your iPhone on a tripod with a smartphone holder and tap the shutter button. To stop the exposure, tap the shutter button again. For star trails you have to expose for at least 15 minutes. If you expose longer, the stripes become longer. The photo below was taken with an exposure of 30 seconds
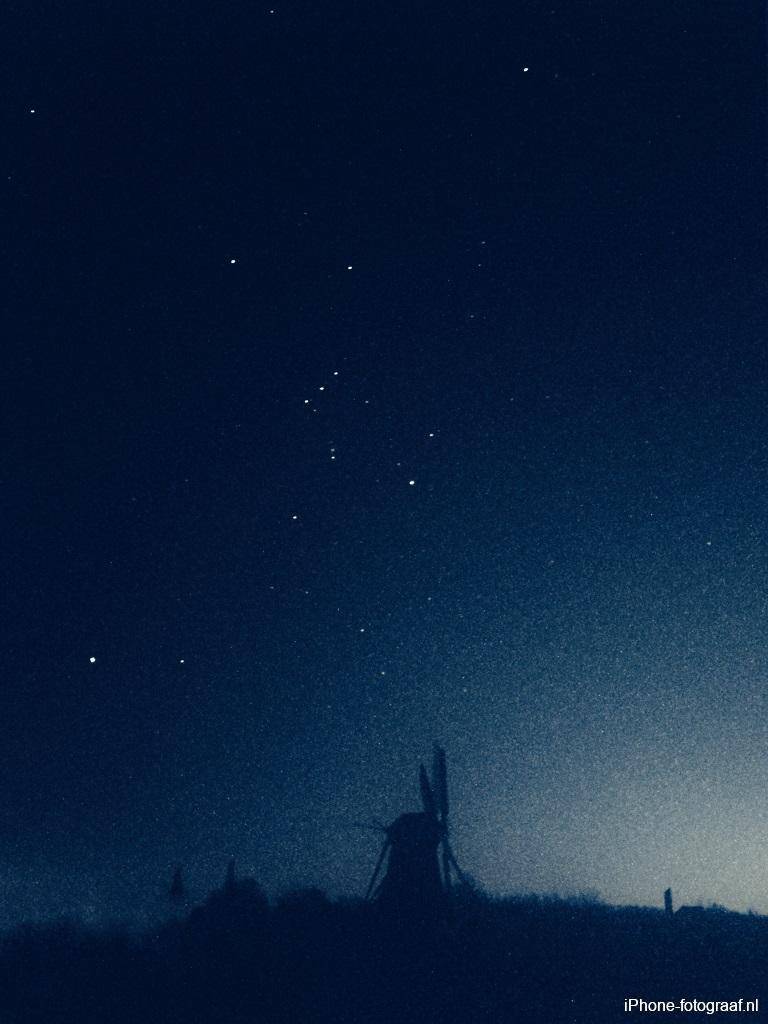
How to take pictures of stars with an iPhone 11 or iPhone 12
The iPhone 11 and iPhone 12 have a Night mode, which allows you to photograph in low light. With the Night mode I tried shooting the stars and was pleasantly surprised by the result.
The photo below is an example of the night sky photographed with the iPhone 11 Night mode. There are many stars visible and there is little noise. The sky is a bit lighter than it really was, but that can easily be corrected with photo editing.
Tips for taking night sky photos with an iPhone 11 or iPhone 12
- Place your iPhone 11 or iPhone 12 on a tripod with a smartphone holder.
- Focus by tapping the brightest star or an object in the distance. Focusing is slow.
- The Night mode is switched on automatically. You can increase the automatically selected exposure time by tapping the yellow Night mode icon in the top left of the screen. Then swipe the slider to the left to increase the exposure time to Max.
- Experiment with focusing and exposure time and take lots of photos.
- Experiment with ProRaw file format on iPhone 12 Pro and iPhone 12 Pro Max for more details.
Conclusion
With both apps I have made pictures of the night sky that reflect reality well. The stars are not very bright due to the city light. Slow Shutter Cam remains my favorite app for shooting with slow shutter speeds. Because of the good results with the fully automatic Stars mode, I will use NightCap more often for photographing the night sky.
Update: If you have an iPhone 11 or iPhone 12, you can photograph the night sky with the Night mode. There is no need to download an app.
Downloads
Slow Shutter Cam App Store
NightCap Camera App Store
Snapseed App Store
Operations in Snapseed
The photo I made with Slow Shutter Cam has been edited in Snapseed as follows:
- I removed the line caused by a moving car with tools / healing.
- I increased the contrast with tools / tune image / ambiance -100.
- With tools / selective I made the horizon slightly lighter so that the silhouette of the windmill became more visible.
- Finally, I applied the filter tools / grainy film A03 with the +20 setting.
I made this photo with Slow Shutter Cam and edited it with Snapseed.
Maybe you want to view my Snapseed tutorial for easy-to-follow instructions and video tutorials.
Read also my blog about HDR iPhone photography or go to the overview with all iPhone photography blogs.