Introduction to motion blur photos and panning
Motion blur gives iPhone photos a sense of movement and can make the images more dynamic and interesting. In this blog I explain to you how you can take photos of a fast moving subject with motion blur on your iPhone and one of the ways I discuss here is panning. You have to use a slow shutter speed. Because you need a long exposure time and the light sensitivity of the sensor in most apps can not be lower than ISO 25, you need fairly low light conditions. The examples I show here are made with 1/4 or 1/8 of a second.
There are two ways of shooting motion blur photos on iPhone
You can shoot fast-moving subjects with motion blur in several ways.
Keep the iPhone still
Keep the iPhone still, so that the moving subject becomes blurred with the background and stationary objects in focus. For this method you can possibly use a tripod. In that case use the self-timer or take the photo with the iPhone earplugs by pressing the volume + button.
How to take motion blur photos on your iPhone with panning
Move the camera with the subject, so that the subject is sharp but the background is blurred (panning). With this technique you get a sense of speed in your photo
The ProCamera app
With the iPhone Camera app you can not set the shutter speed. For that you can use the ProCamera app. This app has a Lowlight mode and a shutter-priority mode, in which you can select low shutter speeds and Anti-Shake. You can choose from 1/8, 1/4 or 1/3 of a second in this mode. If you use the anti-shake setting, the photo will only be made if the iPhone is not moved, according to the creator of the app. Another advantage of ProCamera is that the app can make RAW photos.
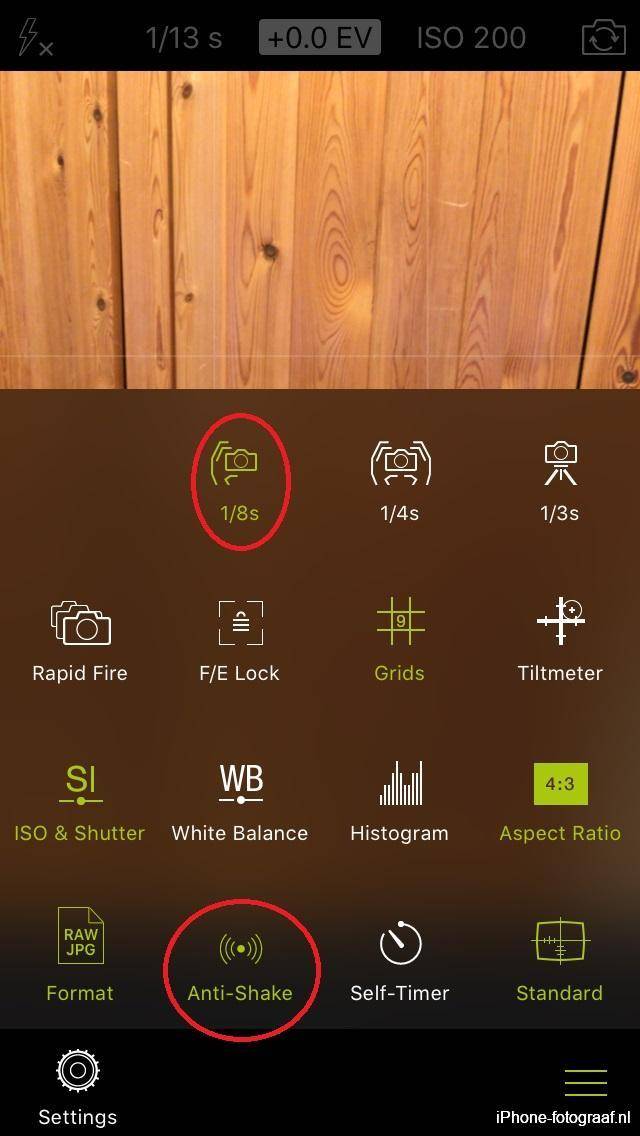
The settings of LowLight mode. 1/8 of a second and Anti-Shake are selected.
Examples of motion blur photos with ProCamera
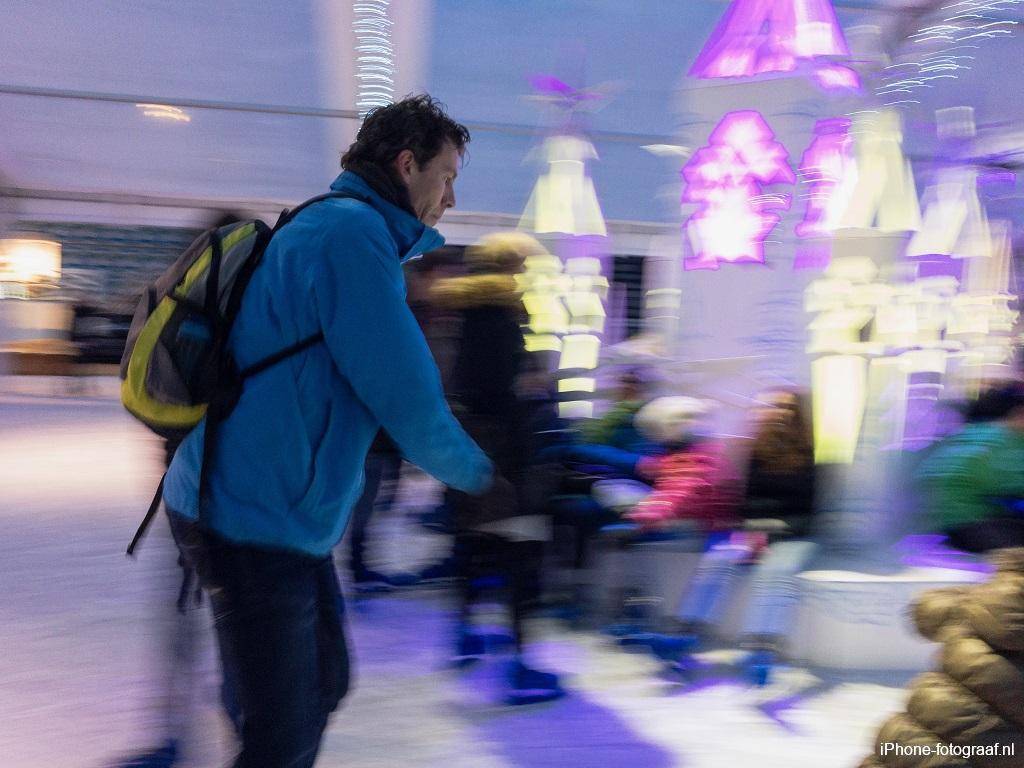
These photos were taken with the ProCamera app in the LowLight mode. The shutter speed was 1/8 and the Anti-Shake option was enabled. Because I kept the camera still, the background is sharp and the fast-moving skaters are displayed as a smudge. The street scene with the Christmas lights is made in the same way. The reflections of the lights on the wet street provide extra atmosphere.
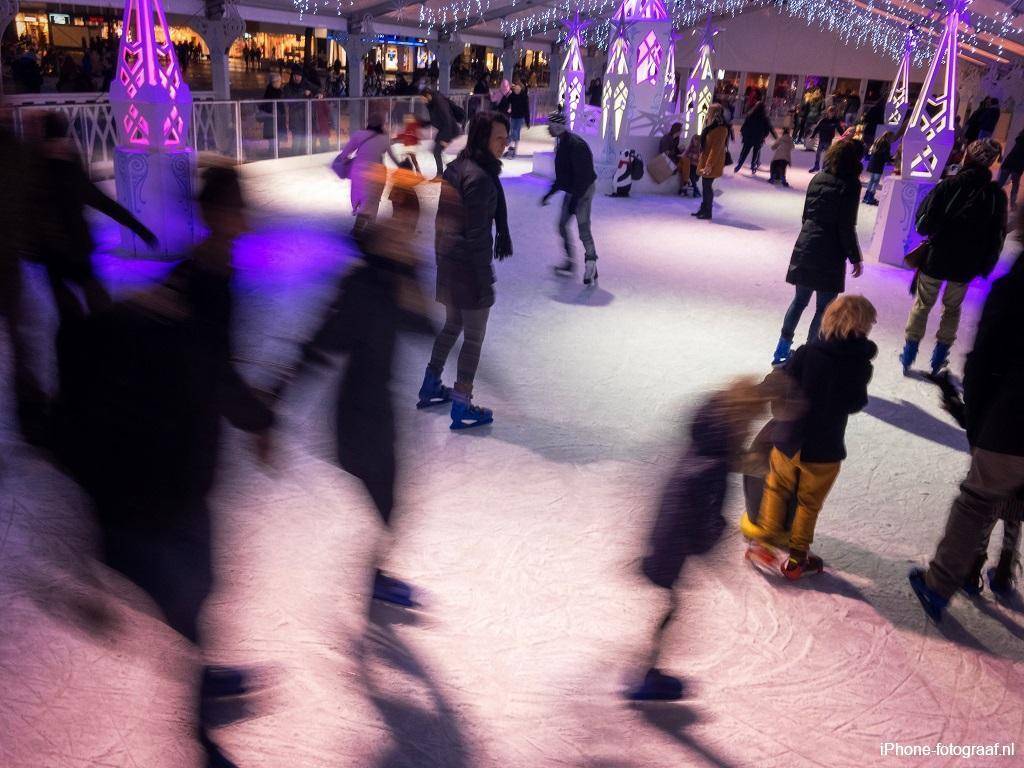
The skating rink on the Grote Markt in Groningen. Photographed with an iPhone 6s.
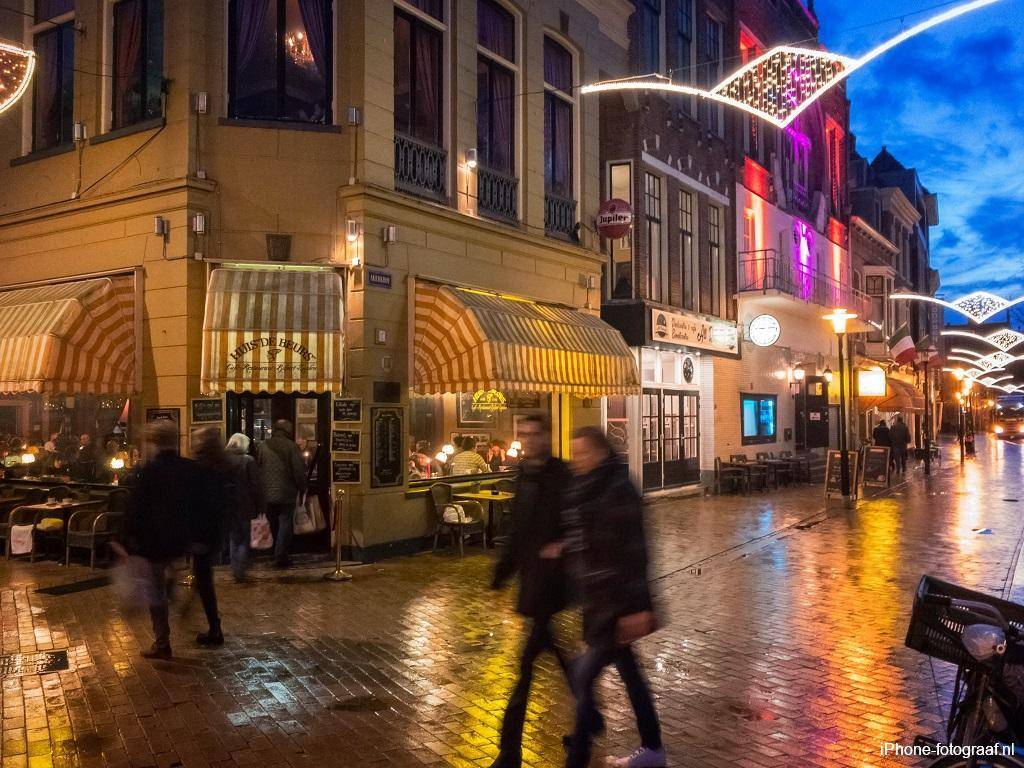
A street scene in Groningen. Photographed with an iPhone 6s.
How to take motion blur photos on you iPhone with the iPhone camera app
If the lighting conditions are poor, you can also shoot motion blur with the iPhone Camera app. In fairly low light, the iPhone Camera app will bring the shutter speed down to an exposure time that can still be photographed by hand. In this text I explain how the exposure of an iPhone works. The photo of the scooter is made with the iPhone Camera app and an automatically chosen shutter speed of 1/4 second. With this long exposure time, I succeeded in photographing the movement of the cyclist.
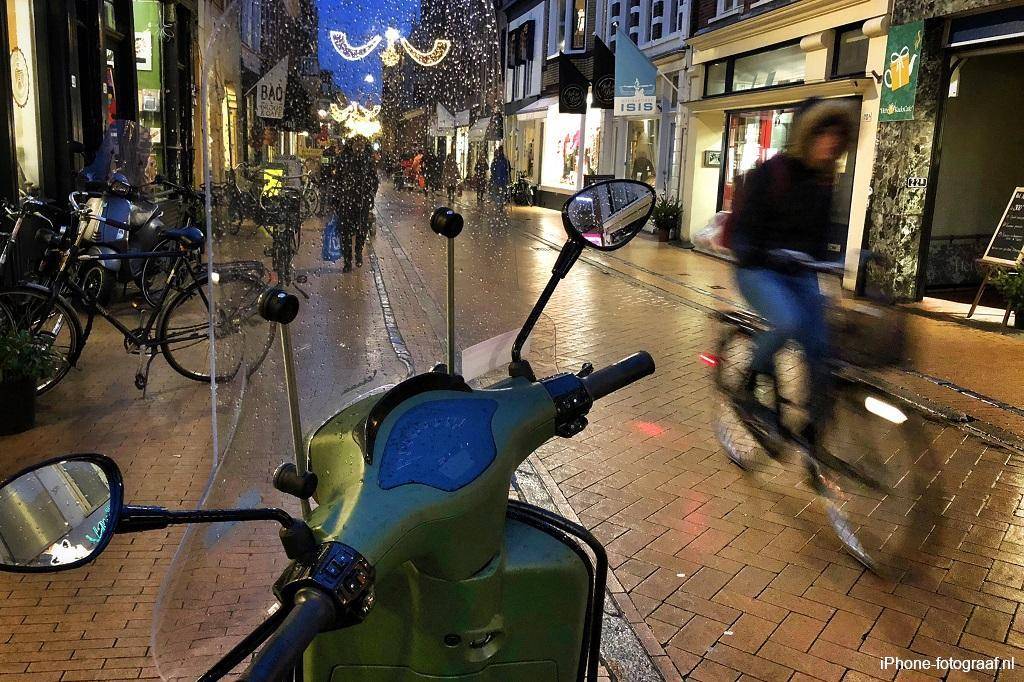
This photo is made with the iPhone Camera app and an iPhone 8 Plus. The automatically selected exposure time was 1/4 second.
Examples of panning
I made these images with ProCamera and a shutter speed of 1/8, but without the Anti-Shake option. This function does not work when the iPhone is moving. For a sharp moving subject you have to move the iPhone at the same speed. With panning you get more speed in your photo and you can achieve beautiful results with it, but it is not easy and you have to practice a lot.
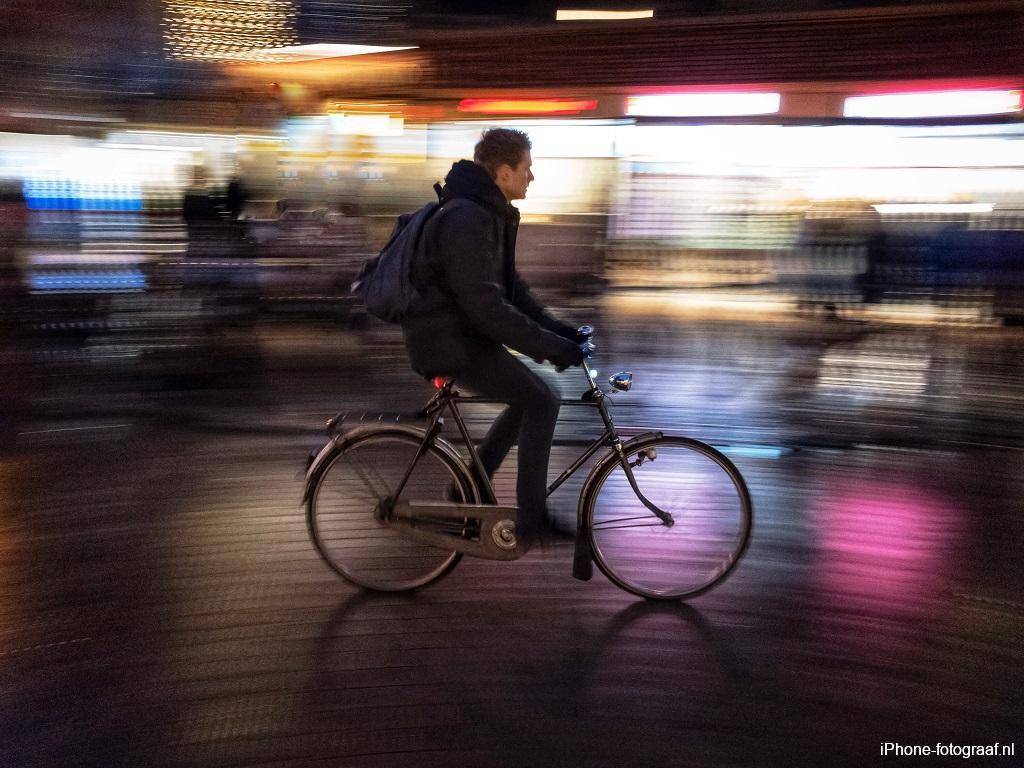
The cyclist is sharp and the background is out of focus, because I have moved the iPhone with the same speed (panning).
It is not easy to get the subject sharp with panning, but it produces nice results.
Download
ProCamera App Store.
Read also my blog about HDR iPhone photography or go to the overview with all iPhone photography blogs.