What is an iPhone RAW photo?
Starting iOS 10, the creation and editing of RAW photos with an app on iPhones with 12 megapixel cameras is supported. An iPhone RAW photo file contains the unprocessed RAW data captured by the sensor. On a RAW file you can apply edits that would otherwise have been executed by the camera. For example, you can determine the white balance yourself, remove noise and correct the lighting. A JPG or HEIC photo taken with the iPhone Camera app has already been edited and compressed by your iPhone.
The dynamic range of an iPhone RAW photo
In an iPhone RAW picture you can often recover details in dark and light areas that would have been lost in a JPG or HEIC photo. The dynamic range is wider. A similar result can be achieved with the HDR photos from the iPhone Camera app. RAW has the advantage, however, that during editing of the photo you do not suffer from ugly compression artifacts (blocky details).
How to shoot raw photos with an iPhone raw photo app
With the iPhone Camera app you can not shoot RAW photos. In camera apps for RAW photography such as Manual, ProCamera, Lightroom CC Mobile (free) and Camera+ you can select the RAW file format. Lightroom CC Mobile can even store HDR photos in RAW and is also an editing program. With Snapseed you can not take RAW photos but you can import and edit DNG RAW files.
It is important that you make sure that the ISO value is set to a low value (25) during shooting. A higher ISO gives more noise. The ISO value indicates the light sensitivity of the sensor. With a low ISO value, longer exposure with a slower shutter speed is required. In poor lighting conditions, you can use a tripod.
iPhone RAW photo app for editing
Apple uses for RAW photos the file format DNG (Digital Negative) that can be read by many photo editing apps. Snapseed and Lightroom CC Mobile are suitable for editing RAW photos. An important advantage of Lightroom CC Mobile is the filter with which you can remove noise and that you can apply to all photos that you make or import by default. Noise is more visible when you start editing. However, Snapseed has more creative filters and presets. With the filters details/structure and detail/sharpening you can try to make noise less visible.
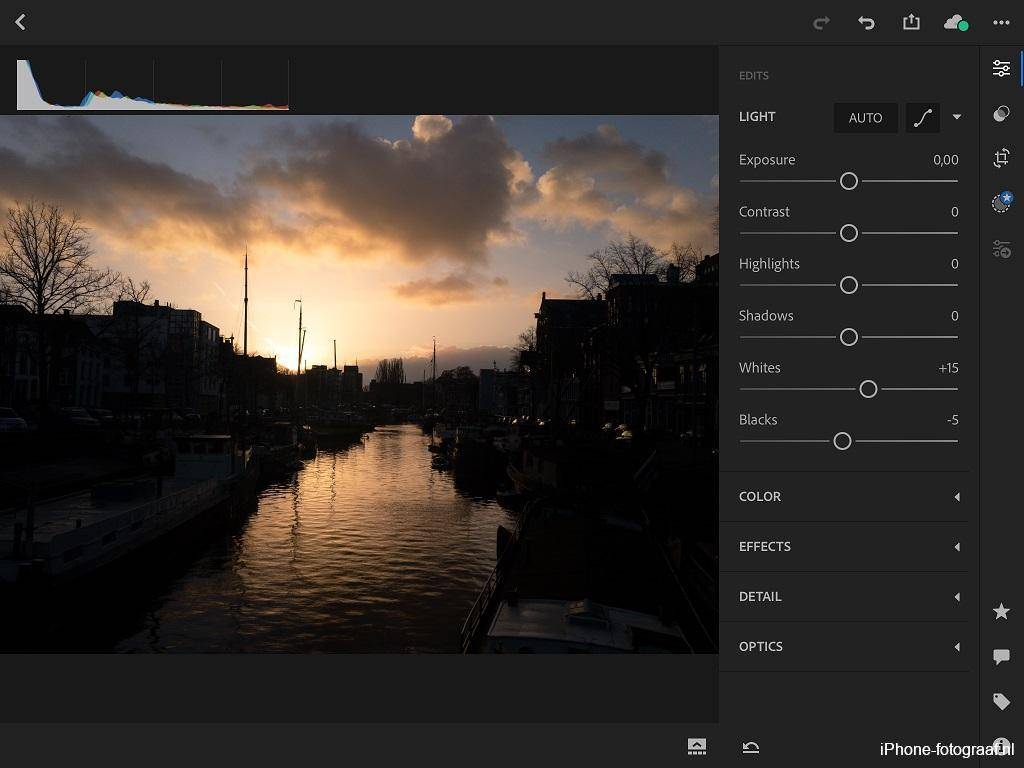
An iPhone unprocessed RAW image imported into Lightroom CC Mobile.
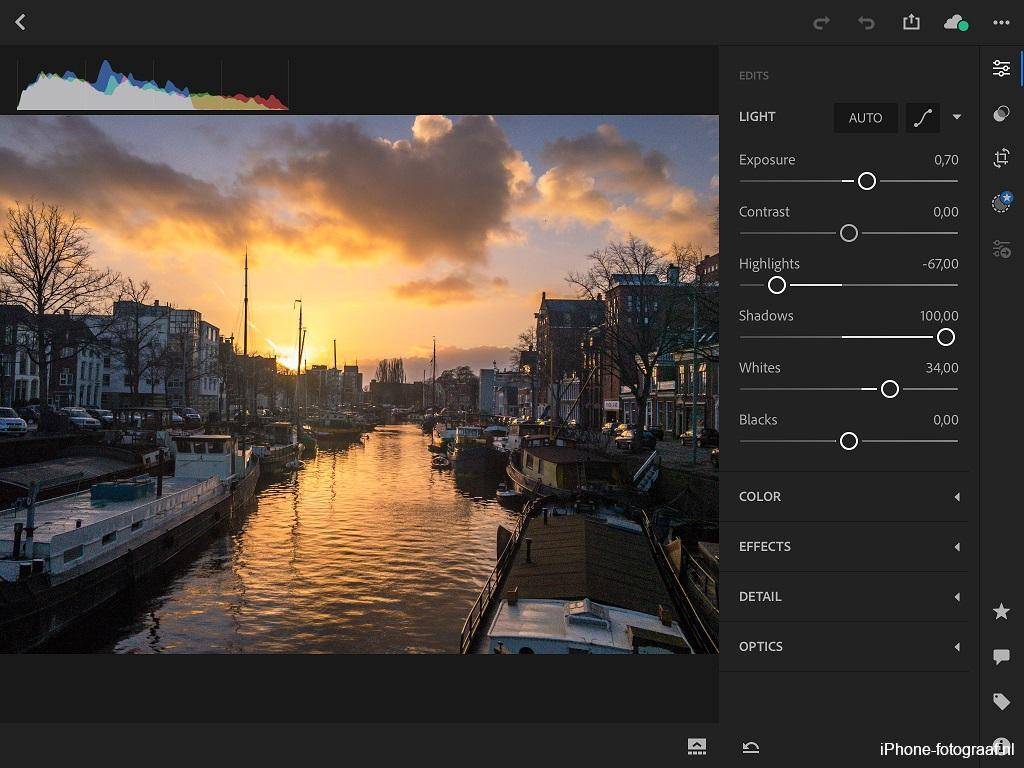
The exposure of the RAW picture is automatically corrected by Lightoom CC Mobile. I increased shadows to 100.
Video: The light section in Lightroom CC Mobile
This video shows how you can adjust the exposure, highlights, shadows, contrast, blacks, whites and curves of a RAW photo in Lightroom CC Mobile.
Video: RAW editing with Snapseed
In Snapseed you can import and edit RAW photos. After importing, the “RAW develop” tool is automatically opened, allowing you to change the exposure and white balance, for example.
Digital negative
After you edited the RAW photo, you convert it to JPG, because RAW can not be read by all programs. The RAW file remains unprocessed and is your digital negative.
The pros and cons of iPhone RAW photography
Pros:
- No loss of image quality.
- A wide dynamic range.
- Very suitable for editing.
Cons:
- RAW photos are unprocessed by Apple.
- Not all apps can read RAW.
- Apps read RAW slower and the burst mode is slower.
- Files are larger than JPG or HEIC. RAW is about 10 MB and JPG 3 MB.
- Portrait mode is not possible.
My iPhone RAW photography workflow
I always edit photos on my iPad. I usually import and edit the iPhone RAW photo in Lightroom CC Mobile. In Lightroom I correct the exposure with the automatic settings light/auto and then I get started with the shadows, highlights, noise reduction etc. until I am satisfied with the result. Then I export the edited photo as jpg and edit it further in Snapseed, for example by applying one of the many filters. The photos of the windmill are an example of this.
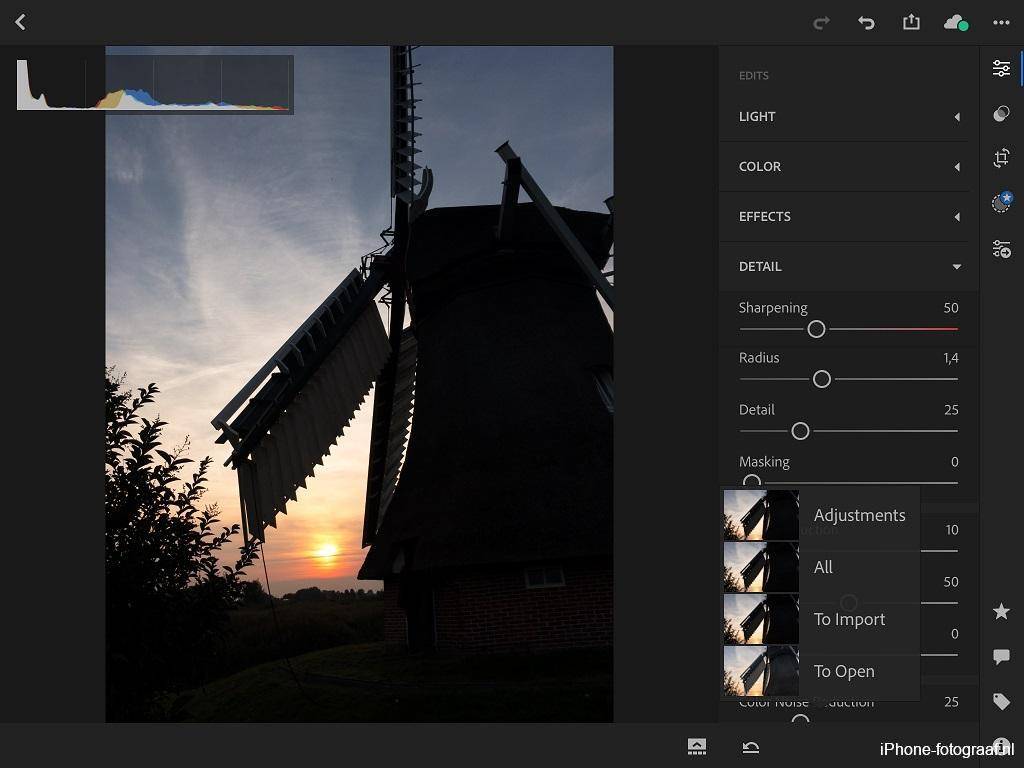
An iPhone unprocessed raw image imported into Lightroom CC Mobile.
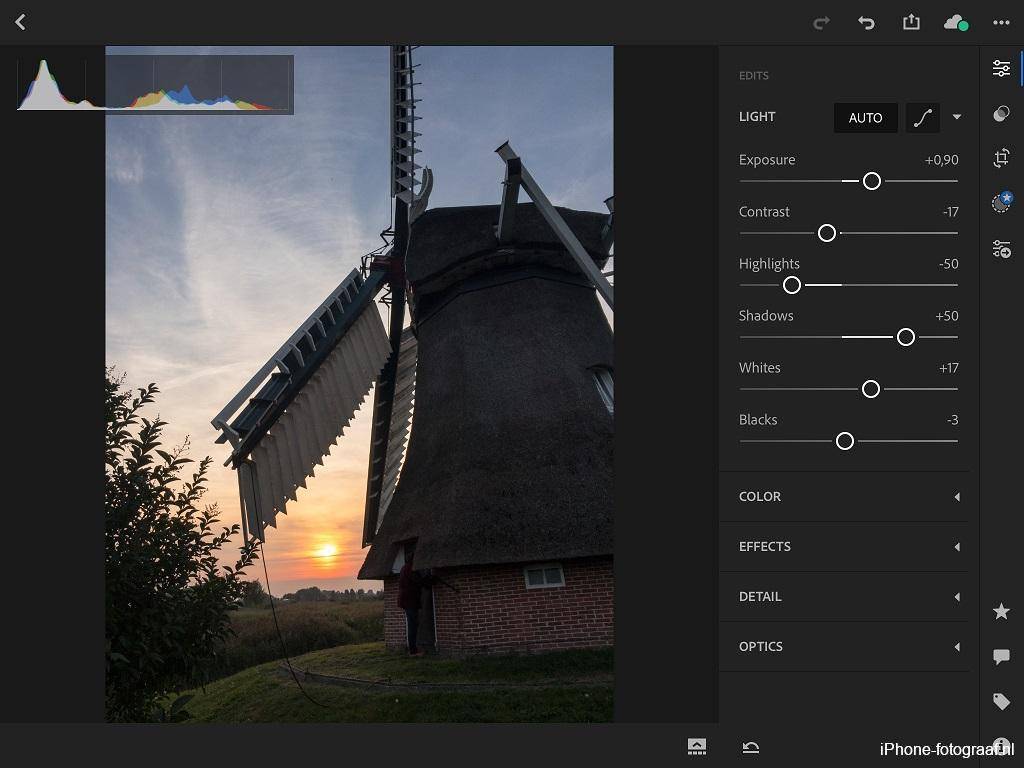
The exposure of the RAW picture is automatically corrected by Lightoom CC Mobile.
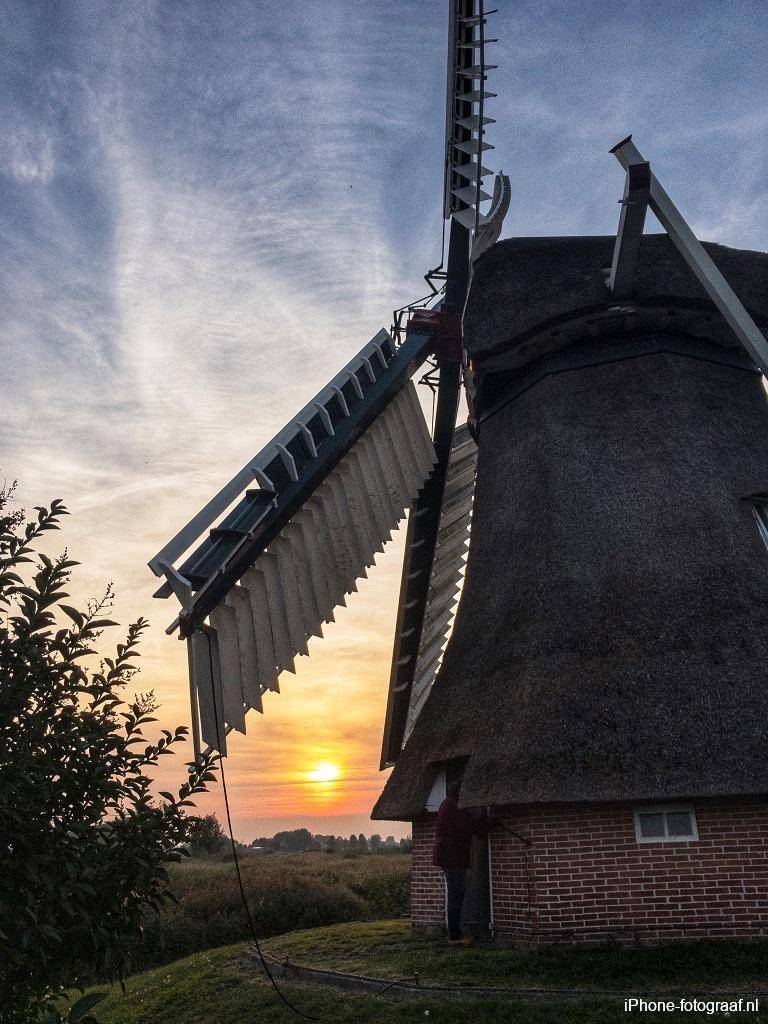
I exported the RAW photo processed in Lightroom CC Mobile as jpg and in Snapseed I straightened it and applied the filter looks / POP.
Conclusion
If you like it to edit photos you’ll get the best results with RAW images and is iPhone RAW photography the way to go.
Download
Adobe Lightroom CC Mobile App Store
Snapseed App Store
Read also my blog about HDR iPhone photography or go to the overview with all iPhone photography blogs.